How to Make a Concrete Sink Mould
Concrete sink moulds have a lot of market value. To create them, you need skill, the right materials, and enough time. It is worth it, though. By making a concrete sink mould, you can make the same concrete sink over and over again, each time revealing perfection.
MATERIALS AND TOOLS
Before you get started making a concrete sink mould, you first need to make sure that you have all the materials and tools required. Here is a list of everything you will need:
- Melamine Board
- Acorn Nuts
- A Pencil
- Hot Melt Glue Gun Sticks
- Universal Mold Release
- Sulfur-free Modeling Clay
- Glue Gun
- Bolts
- Drill
- Turbine Mixer
- Concrete
- VytaFlex 40
- Drywall Screws
PREPARING YOUR WORK AREA
Your work area for creating a concrete sink mould should be clean, spacious, and clear. You need a table to do the work on top of. Preferably choose one at a comfortable height that’s covered in a non-stick material (in case anything spills!). Doing so will make the clean-up a lot easier.
You should also line up everything you need to use during the process. Keeping most items at arm’s reach will help make the process a lot easier. If you need help remembering each step, you could even pin up a step-by-step guide (like this one!) so that you never forget what part comes next.
Now, you can learn how to make a concrete sink mould.
STEP BY STEP TUTORIAL ON HOW TO MAKE A CONCRETE SINK MOULD
Once you have your materials and you have set up your workstation, you likely want to know how to build a concrete sink mould. In this step-by-step guide, you will learn how to make DIY concrete sink moulds to perfection. Follow each step carefully, making sure you do not skip any parts. That is crucial!
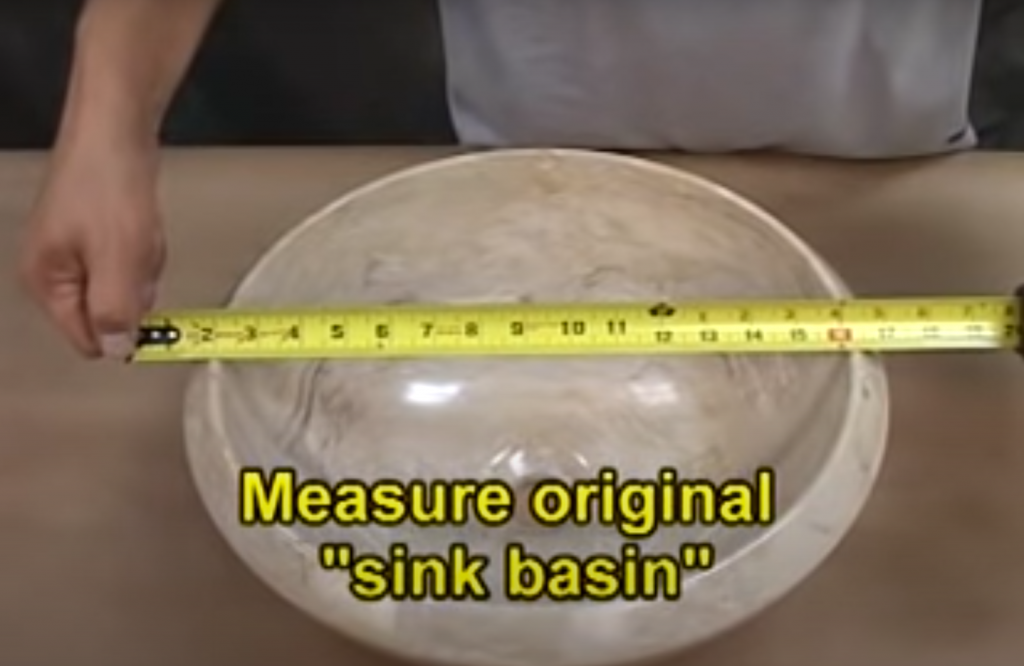
STEP 1 – CONSTRUCT MOULD BOX
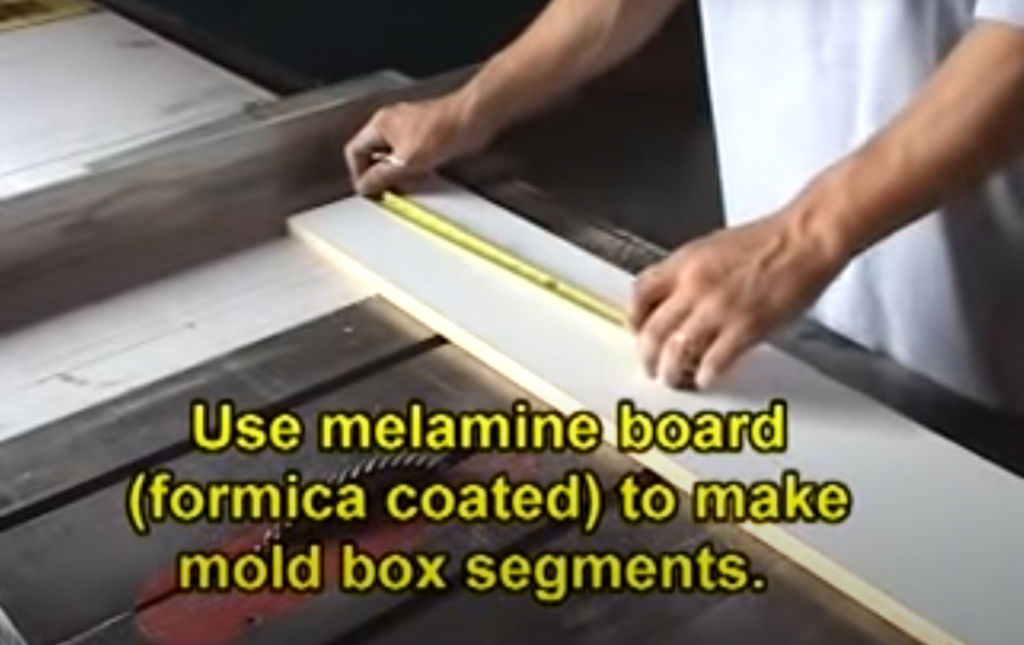
Your first step to making a concrete sink is to construct the mould box. First, you must measure the sink you want to mould, including the depth and length. Be as specific as possible, down to the millimeter.
After that, you want to take your melamine board to make the mould box segments. Do this carefully.
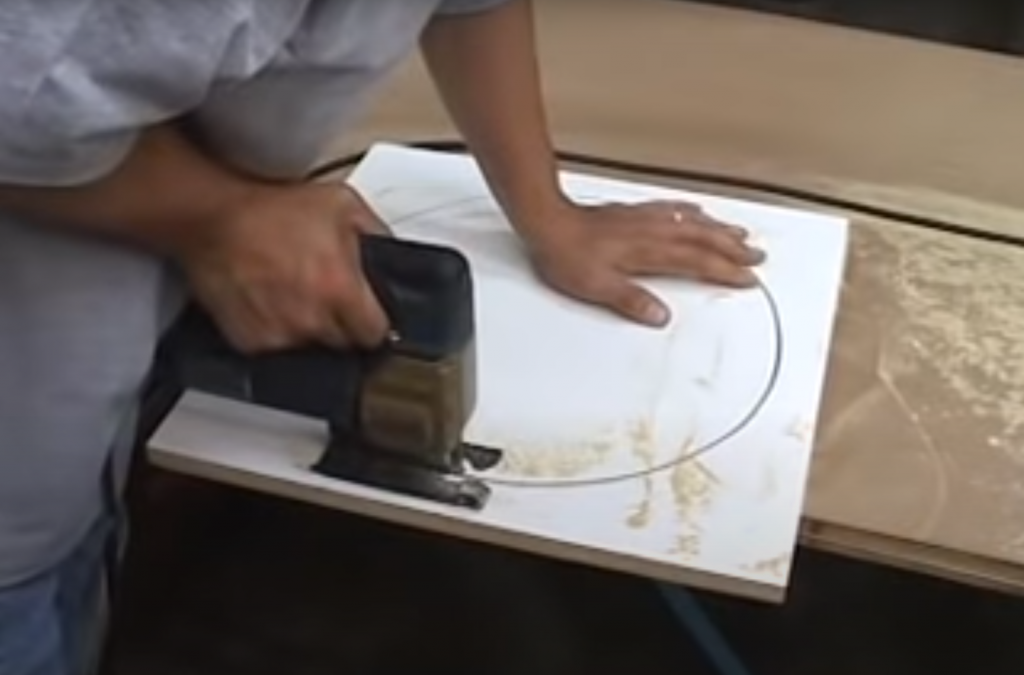
STEP 2 – CREATE SPACER BOARD
Now you need to create your spacer board. Start by getting out your baseboard and then carefully centering your model atop it. Then, using a pencil, pencil in the outline of the perimeter onto the space board. This will be used for cutting.
Once you have your circular drawing, it’s time to get out the drill. Drill a hole in one section of the circle’s perimeter, and use a jig saw to cut around it carefully. Pull the spacer box out.
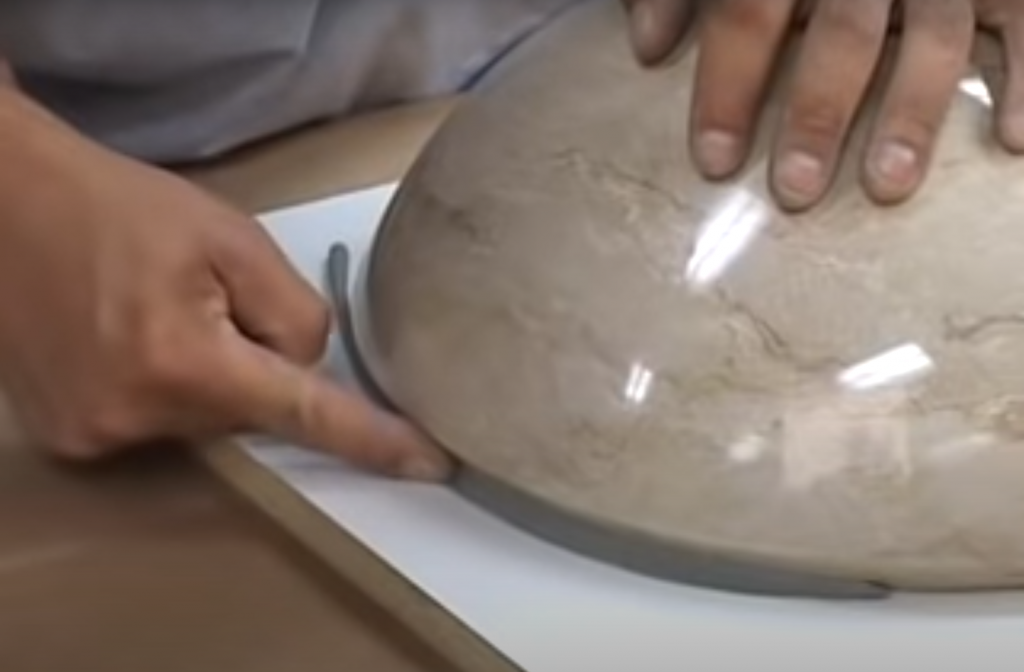
From there, place the model on the baseboard and put the spacer board on top of it, lining it up with the baseboard. Then, using a black marker, mark the alignment points on both the spacer board and the baseboard. Make sure they match perfectly.
Next, you need a gasket. You will use non-sulfur-based modeling clay here. Roll out the clay and then place it on top of the baseboard, outlining the model. Using your fingers, poke it under to ensure it’s secure. Again, place the spacer board on top of the model (and the clay). This should seal it in. Use a sculpting tool to pull the clay over the spacer board to fill the entirety of the negative space. Remove any excess.
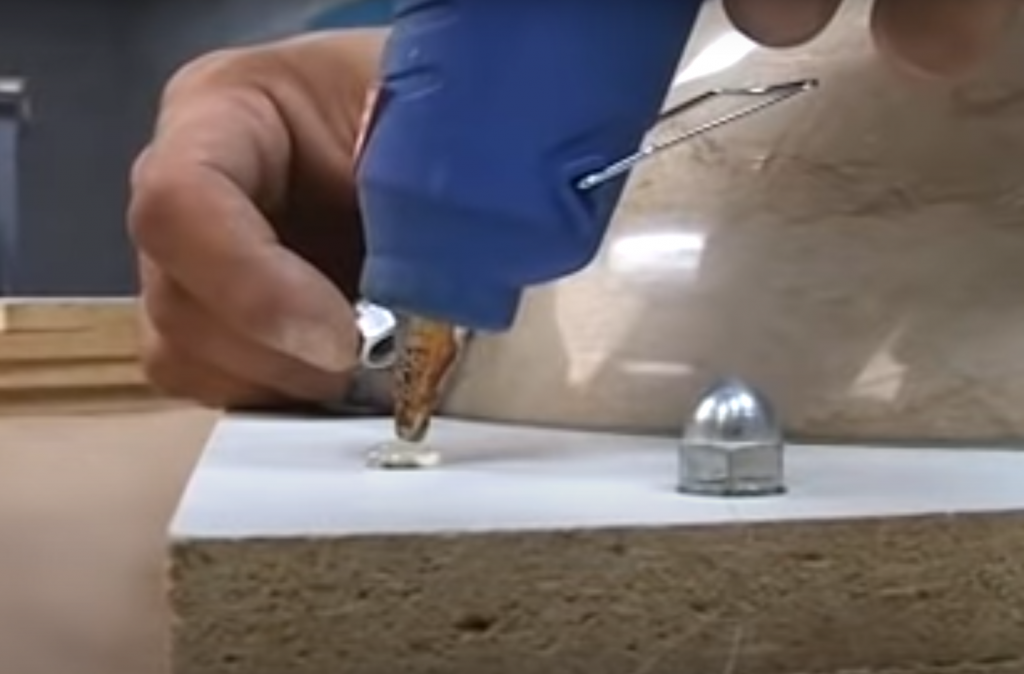
STEP 3 – ACORN NUTS WILL BE USED TO CREATE REGISTRATIONS KEYS
Now you need acorn nuts and a hot melt glue gun. This will be used to create registration keys. Secure the acorn nuts with the glue onto the spacer board’s corners. You can place two in each corner and an extra one for orientation.
STEP 4 – ASSEMBLE AND SEAL MOULD BOX
Next, take your drywall screws to screw the melamine boards together around the spacer board. It should box the model in. To seal the seams, use hot glue.

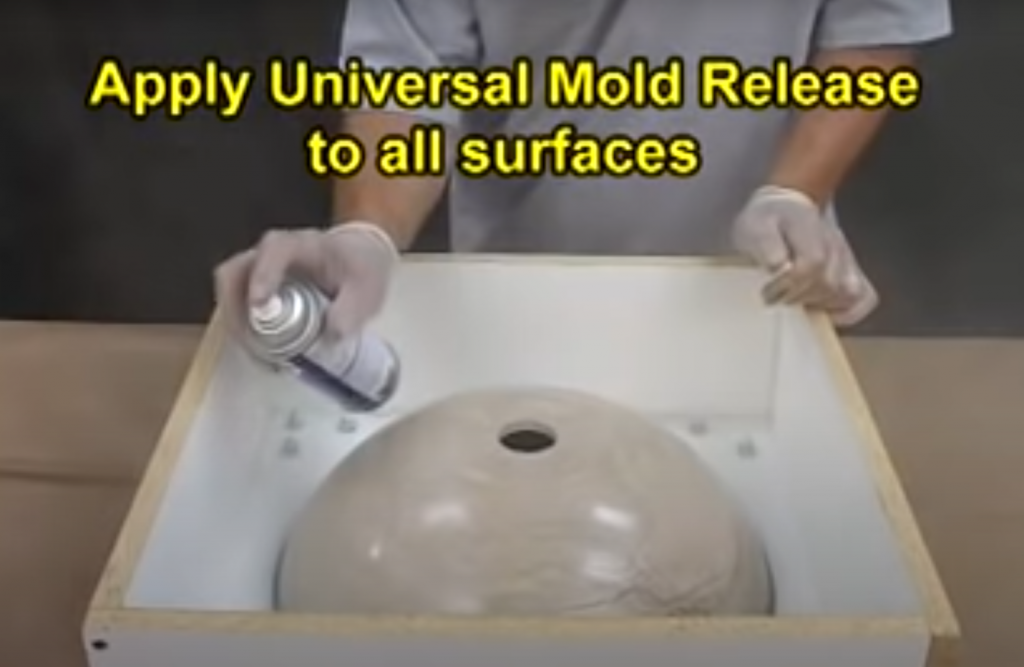
STEP 5 – RELEASE MOULD BOX AND MODEL
Step 5 involves starting to release the mould box and the model. Start by applying the Universal Mold Release to every surface. Cover its entirety, carefully spraying it over each part. Don’t miss a section!
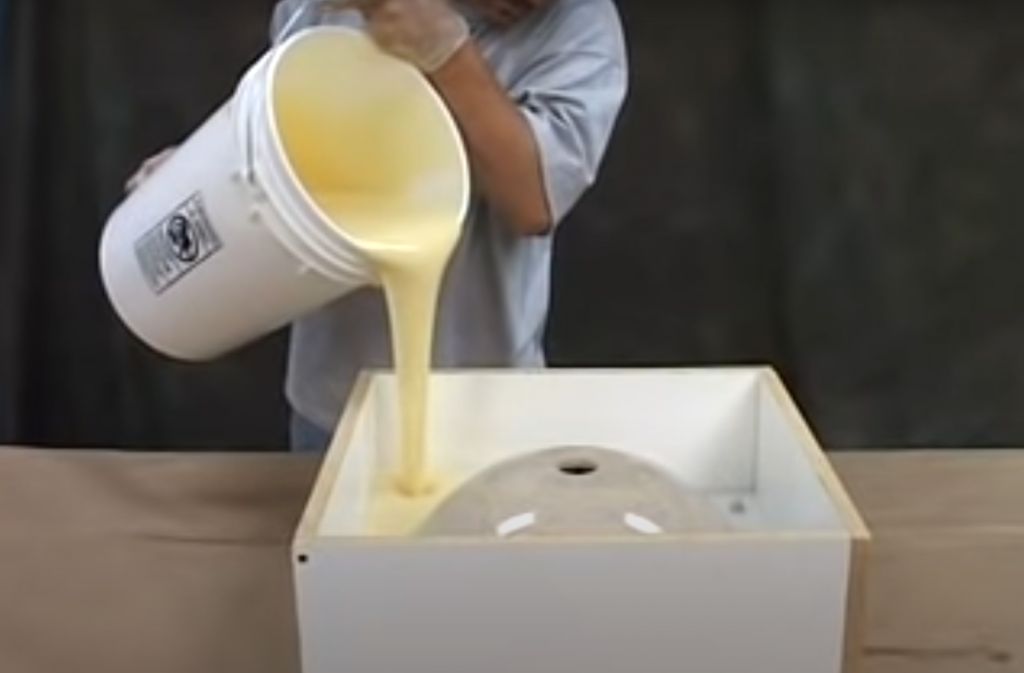
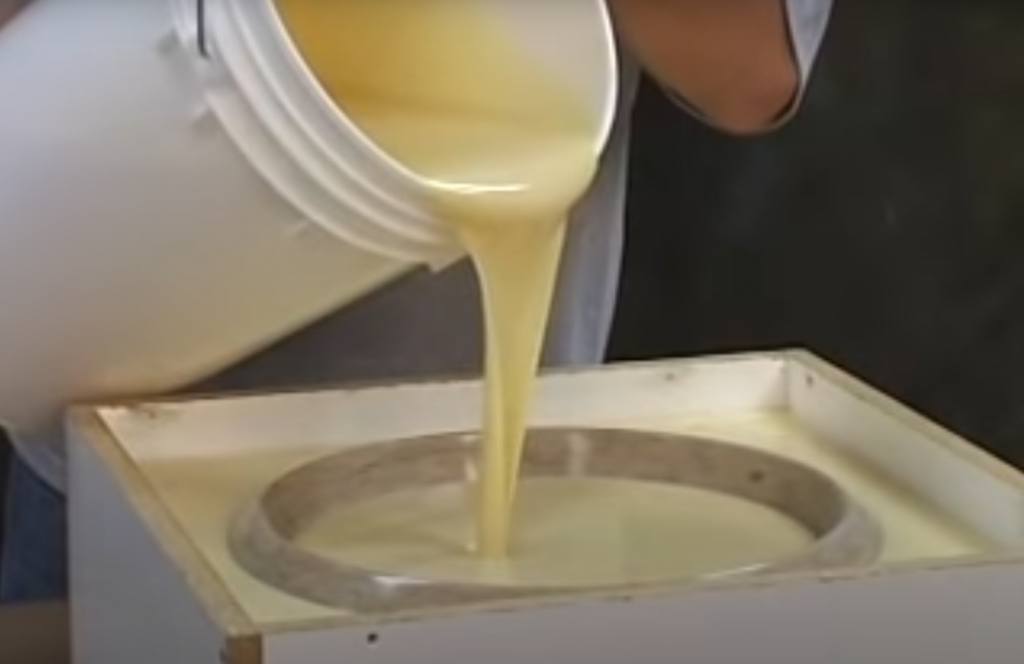
STEP 6 – MEASURE, MIX, AND POUR VYTAFLEX 40 MOULD RUBBER
Now it’s time to start mixing. Get out your VytaFlex 40 and use the mix ratio of 1 part A to 1 part B (by volume) before mixing it with a turbine mixer. Then, pour it over the model slowly and carefully. It should fill until nearly the top – stop before the hole.
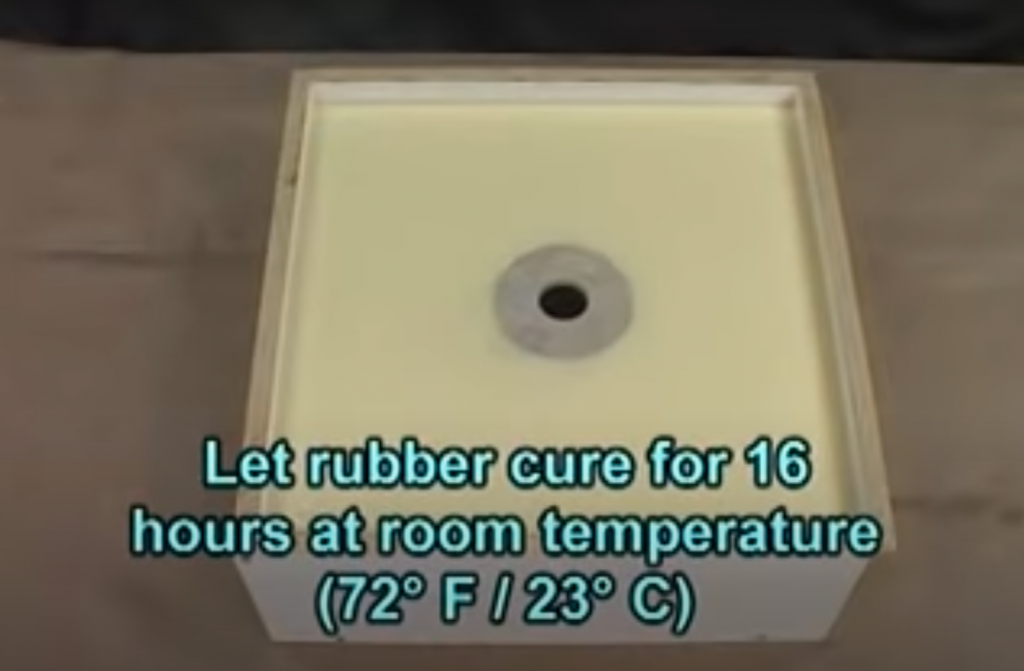
Once poured, leave it to cure for 16 hours at room temperature. Do not touch it at all during this period. Room temperature is around 72 degrees Fahrenheit or 23 degrees Celsius.
STEP 7 – PREPARE TO MAKE THE SECOND HALF OF THE MOULD
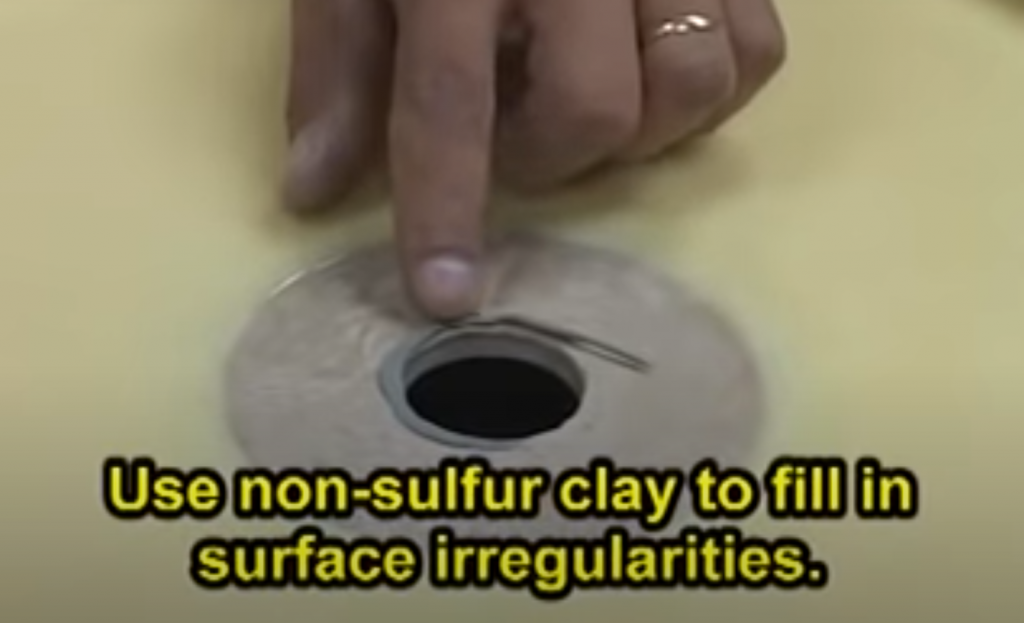
Once those sixteen hours have passed, use your non-sulfur clay to fill the surface. You can fix any irregularities with it. Smooth the clay over carefully.
Now it’s time to measure and cut the reverse side baseboard. This part sits on top of the rest. Bang it in with your fists so that it is fully secure before using the drill to secure it further. Then, turn the mould box over completely. Unscrew the nails to take off the original baseboard. This should reveal the sink on its right side.
Now, you can remove the spacer board, the acorn nuts, and the clay gasket. Wipe it with a clean cloth to remove any clay residue.
![]()
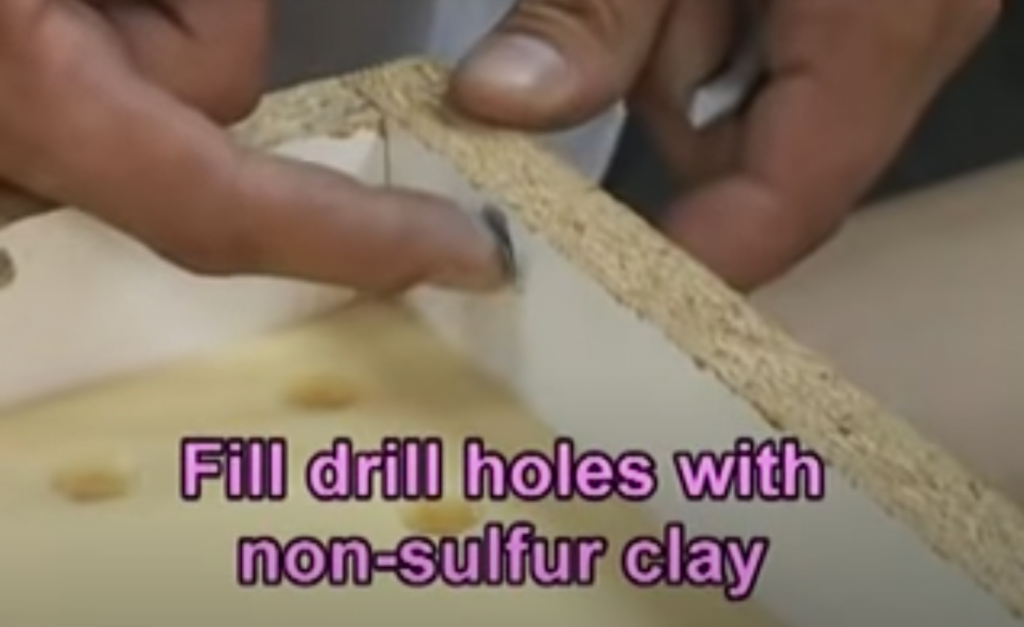
STEP 8 – SEAL DRILL HOLES AND RELEASE MOULD BOX
Using non-sulfur clay, fill in any leftover holes and seal the seams using the hot gun glue. Again, it’s time to use the Universal Mold Release spray – spray it all over just as you did previously.
STEP 9 – MEASURE, MIX, AND POUR VYTAFLEX 40 MOULD RUBBER
Time for more mixing. Mix another ratio of 1 part A to 1 Part B of VytaFlex 40 with your turbine mixer. Pour it over the sink model until it reaches the top and overflows. You want it to completely fill the box.
Just as you did before, let the rubber mould cure at room temperature for sixteen hours.
STEP 10 – DEMOULD ORIGINAL MODEL
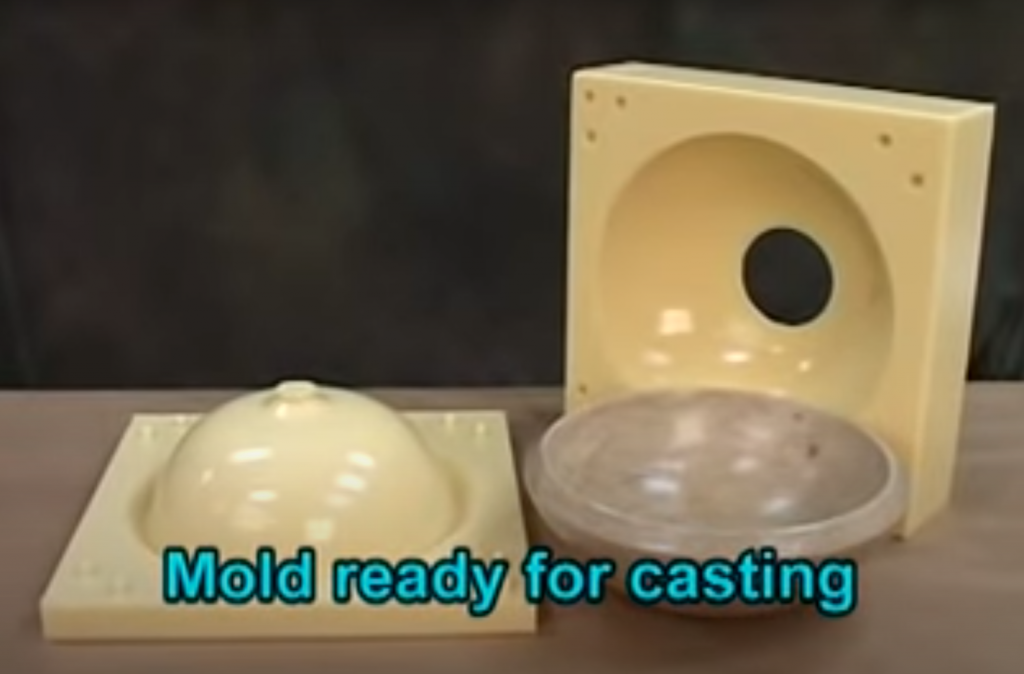
Once the second period of sixteen hours has passed, it’s time to demould the original mode. Start by removing the side walls of the mould box. Then, carefully lift the top to reveal the top of the mould. Then, get to the mould cavity by gently prying the model. Take your time and do this part carefully. Once you get a grip, the original model should easily pull free.
Now, your mould is ready for casting with concrete!
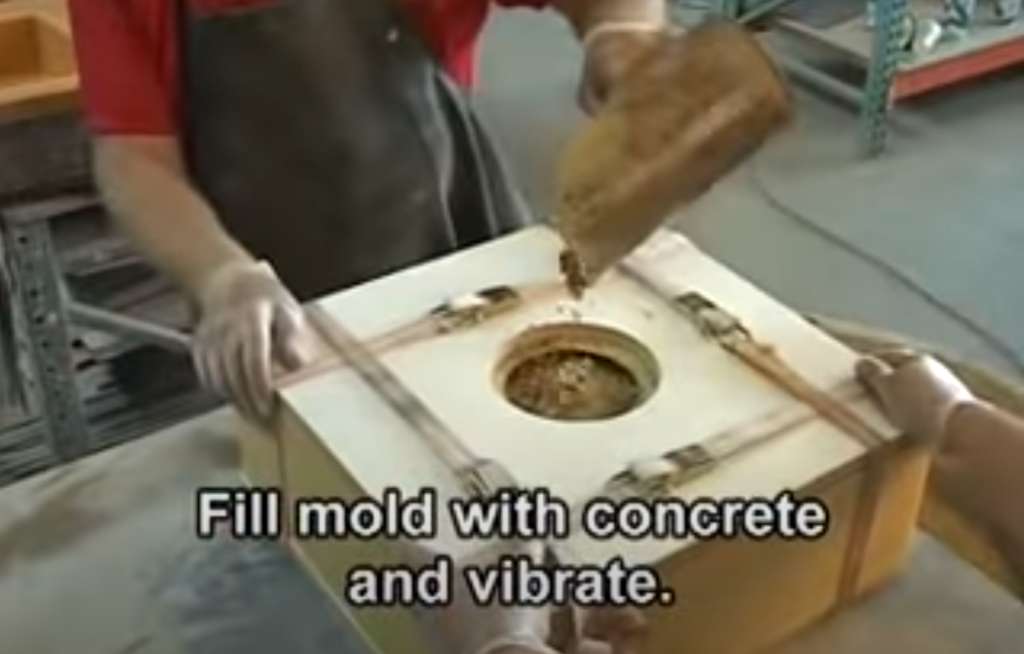
STEP 11 – CASTING CONCRETE
You now have your mould. To get it ready for casting concrete, apply In and Out II release agent to its surfaces with a cloth. Be as thorough as you can.
Then, using four straps and baseboards, tightly secure your mould before putting it on the vibration table. It is time to fill it with concrete.
Put the concrete into the mould while the vibrating table runs. Do it a little at a time. Once filled, let it cure for 24 hours.
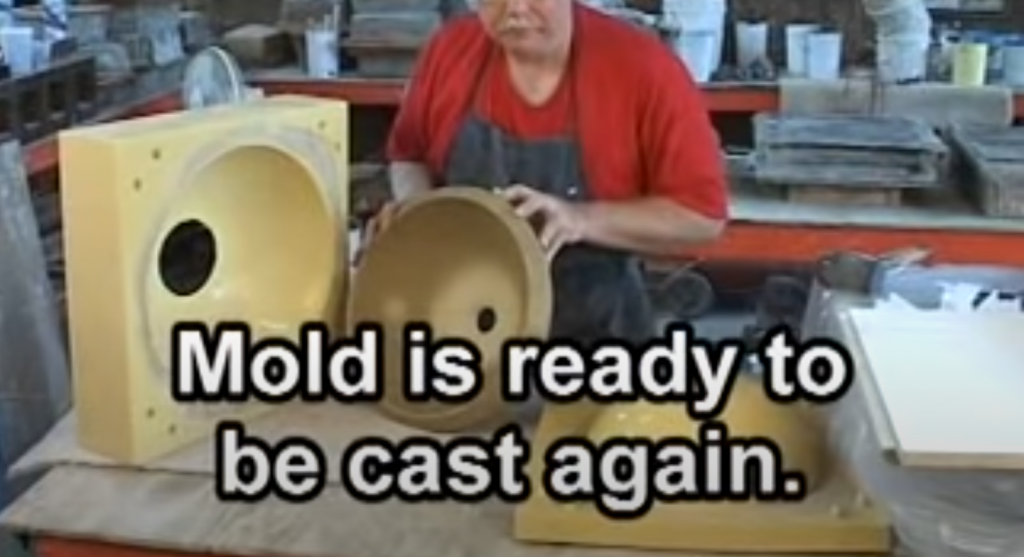
STEP 12 – DEMOULD CONCRETE CASTING
Undo the straps and pry away the rubber boards to reveal the finished concrete sink. Enjoy your craftsmanship!
You can now use the mould to cast another concrete sink.
FAQS
Take a look at some of these frequently asked questions if you have any more questions – they may be answered here.
CAN BEGINNERS MAKE A CONCRETE SINK MOULD?
It’s crucial to familiarize yourself with the tools and equipment used when making sink moulds for concrete. It’s better to have some experience with moulding and concrete prior. However, the task isn’t too difficult to learn!
WHY USE CONCRETE FOR SINKS?
Concrete is solid, attractive, durable, and creates a unique look every time. It adds charm to the surrounding space, which draws in a lot of home decorators.
HOW DO I STAY SAFE WHILE MAKING A CONCRETE SINK MOULD?
To protect yourself, you should wear protective gear such as gloves, goggles, and masks. You should also be very familiar with the tools you use. The more experience you have, the safer the practice.
If you have any more questions about making a concrete sink mould, or you want to get in touch about our products, feel free to contact Rowe Trading.