How to Make Resin Jewellery: a Step by Step Tutorial
Are you looking to make your own resin jewellery?
If yes, then you have come to the right place.
While the process of making resin jewellery can look a little challenging to say the least, with our simple and straightforward how-to-guide, you’ll be a resin jewellery-making pro in no time.
The secret to creating amazing resin jewellery is down to the type of resin that you choose to use and making sure that you prepare everything in advance.
To find out how to make resin jewellery, either for yourself or to sell, all you need to do is keep reading.
Within the below guide, you’ll discover:
- What is resin jewellery?
- What materials and tools are needed to make resin jewellery?
- How to prepare your work area to make resin jewellery
- Step-by-step guide on how to make resin jewellery
- Our top resin jewellery-making tips
- Resin Jewellery FAQs
Ready to get started? Keep reading to learn how to make your very own resin jewellery!
WHAT IS RESIN JEWELLERY?
Resin jewellery refers to any type of jewellery that is made from the chemical compound resin. There are several different types of resin available, including epoxy resin, polyester resin, and UV resin.
EPOXY RESIN
This provides a crystal-clear surface and is ideal for the production of both jewellery items and accessories. This type of resin is recommended for beginners as it is easy to mix, simple to use, and always delivers great results.
POLYESTER RESIN
This type of resin dries very quickly and is also very robust. This means that you need to be confident in your jewellery-making abilities as this resin does not allow time for mistakes. Polyester resin is typically used for moulded parts such as in boat building or profile plates.
UV RESIN
Usually used by DIY enthusiasts, UV resin dries much quicker than the above types of resin as it does not have to be mixed with another component and instead cures completely underneath a UV light. Again, this type of resin is better suited to experienced resin jewellery-makers due to its fast-acting nature.
Resin is made up of two parts: the resin itself and the hardener. Both of these parts are in liquid form until they are mixed together, and then they become solid.
When it comes to resin jewellery, you can make almost any type of jewellery from this chemical compound. However, earrings and pendants are the most popular.
To make resin jewellery even more aesthetically appealing, objects such as flowers, beads, glitter, and gemstones can be added to the resin. This process is known as casting.
If you would like to add some decorative touches to your resin jewellery, some of the most popular items include:
- Dried flowers
- Glitter
- Shells
- Feathers
- Fossils
- Rhinestones
- Special resin charms
Resin jewellery has soared in popularity in the last few years, with consumers wanting to repurpose existing materials.
The process for making resin jewellery varies depending on the type of jewellery being made and the intended design.
Read on to discover exactly what you need to make resin jewellery and how to do it!
MATERIALS AND TOOLS REQUIRED
To make resin jewellery, you need the following materials and tools:
- Sulphur-free clay: Sulphur-free clay is a non-toxic modelling clay that is ideal for jewellery-making. It holds excellent detail and is also great for precision sculpting. One of the most popular brands of sulfur-free clay is Sculptex.
- Glue: Epoxy glue is the best type of glue for jewellery making as it is very strong, dries quickly, and can be used for a wide variety of jewellery-making projects, including resin jewellery.
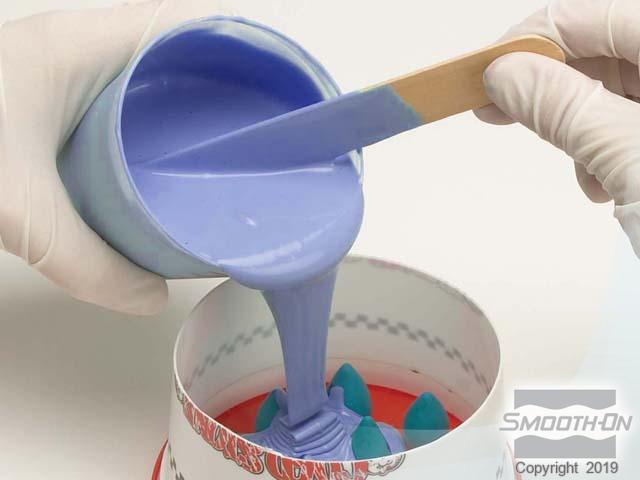
- OOMOO 30: OOMOO 30 is perfect for both novices and expert moulders and is ideal for making resin jewellery. It sets in a few hours, and effectively captures every detail.
- Mixing sticks: Mixing sticks, otherwise known as resin stir sticks, can be reused time and time again. Opt for silicone sticks where possible.
- Mixing containers: Mixing containers for epoxy resin, you should aim to buy silicone ones as these are easy to clean.
- Smooth-Cast 325: Smooth-Cast 325 are urethane resins that are specifically designed for adding colour pigments to. It is a fast-cast resin that can be easily tinted and can take fine detail very well.
- So-Strong Colorants: So-Strong colourants are highly concentrated colourants that offer excellent dispersion and consistent colour. Only a very small amount is needed to create vivid shades.
PREPARE YOUR WORK AREA
As with any project, you need to make sure that your work area is fully prepared before you start making your resin jewellery.
Firstly, you need to make sure that you have sufficient space to make your resin jewellery. Some of the steps require a great deal of concentration and a steady hand, so you don’t want a lack of space causing any unnecessary accidents.
When resin is in its liquid form, and while it is being mixed, it can release harmful fumes. However, once it has solidified, it becomes non-toxic.
If you are working with epoxy resin, you should wear protective gloves and a mask at all times. Your work area should also be well-ventilated.
Your chosen jewellery resin should come with a Safety Data Sheet (SDS), which you should read carefully before you get started. This will tell you everything you need to know about working safely with this resin.
STEP BY STEP: HOW TO MAKE RESIN JEWELLERY
Now that your work area is ready, you can now start the exciting process of making resin jewellery. For optimum results, follow our simple step-by-step guide below.
STEP 1: CREATING AND PREPARING BEADS
The first step is to create your beads using sulphur free clay. If you are not wearing gloves, make sure that you wash your hands first so that the clay stays clean.
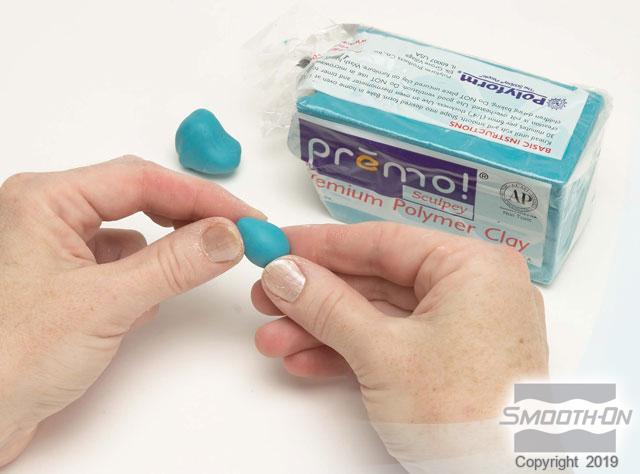
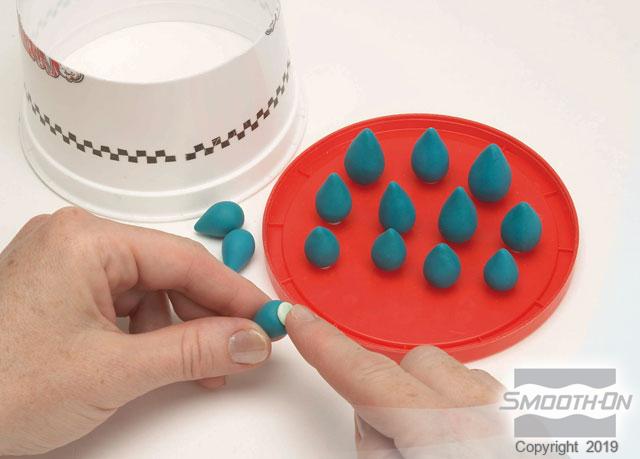
Take your time to create the desired shape and then arrange the finished clay shapes and glue them to the bottom of the container.
STEP 2: MOULDING AND DEMOLDING OF OOMOO 30
Mix the OOMOO 30 silicone according to the manual instructions and then pour it carefully into the container.
Once the OOMOO 30 silicone has cured, you can remove it from the container. Afterwards, you can then remove the clay shapes from the mould.
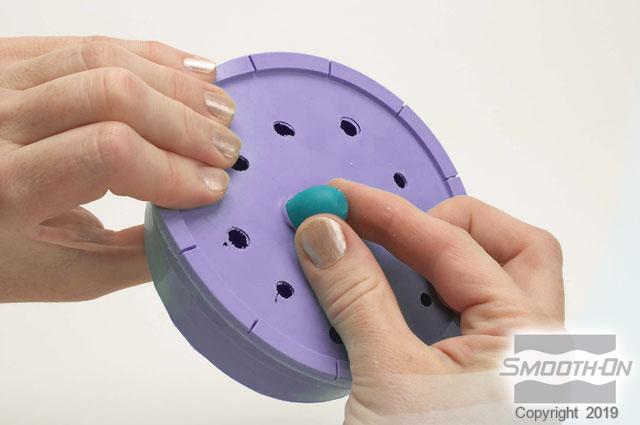
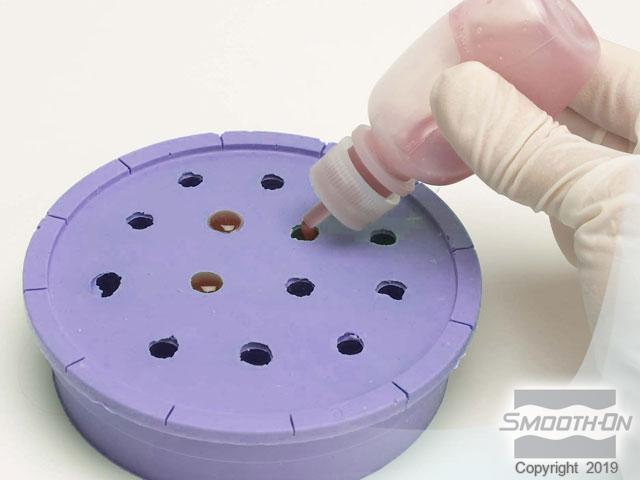
STEP 3: CASTING AND DEMOLDING WITH SMOOTH-CAST 325
Mix the Smooth Cast 325 with your choice of So-Strong colourant and place it into a small squirt bottle. Next, place the resin into the mould cavities.
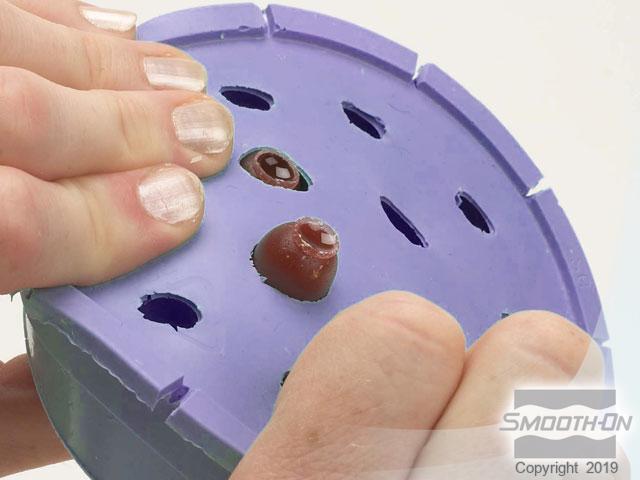
When cured, remove the Smooth Cast 325 beads from the OOMOO 30 mould.
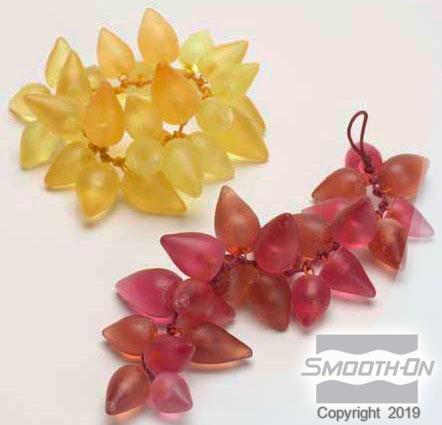
STEP 4: FINISHED PRODUCT
The final step is to sand the beads to ensure a smooth finish and then string them together to create your bespoke resin jewellery. If you are making earrings, you will need to add hooks or chains and clasps for necklaces.
RESIN JEWELLERY MAKING TIPS
If you are making resin jewellery for the first time, then you may be feeling nervous and concerned about making mistakes.
The below resin jewellery-making tips are just what you need to get through the process and create a premium product:
- Work in a dust-free area with good ventilation. Turn off any fans that could blow dust or dirt into your resin.
- Wear gloves that fit snuggly. Saggy gloves can dip into the resin and cause problems.
- Wear old clothes that you don’t mind getting ruined.
- Mix your chosen resin very carefully. You need to get the ratios just right, or it will not cure properly.
- Make sure you have good lighting so that you can see what you are doing. An overhead light and a small lamp providing direct light is the best.
- Ensure that you scrape the sides and the bottom of the container when you are mixing your resin. Do not mix for more than 2 minutes, as working it too much can create extra bubbles.
- Pour the resin slowly into the mould to avoid spilling and to prevent extra air from becoming trapped and causing more bubbles.
- If you get any bubbles, these can be carefully popped with a pin or fine toothpick. Do this before the resin starts to set, or you will ruin it.
- If you are adding layered designs, add this gradually to create a look of floating. Otherwise, all the items will sink to the bottom and not look right. Start by adding a base layer of resin and then add one layer at a time, allowing each one to almost set completely.
- Place your resin under a lamp to facilitate the curing process. Do not touch it or move it until the next day.
FAQS
IS RESIN JEWELLERY EXPENSIVE TO MAKE?
Epoxy resin jewellery is fairly expensive to make because resin epoxy costs more than acrylic paint, which drives up the overall price of your pieces. That being said, the quality of the finished items is high, and you can create some truly original items of jewellery which can either be worn yourself or sold for others to enjoy.
WHAT TYPES OF RESIN IS USED FOR JEWELLERY MAKING?
Epoxy resin is the best choice for people who are new to making resin jewellery as it is the easiest to measure and mix. It can pretty much guarantee great results every time.
Alternatively, a polyurethane or polyester resin will cure hard but require a little more confidence and skill to get right.
You need to be able to work quickly with these types of resins, so if you are not an experienced resin jewellery maker, you are better off using epoxy resin.
CONCLUSION
Whether you’re a jewellery fan who wants to create beautiful individual pieces, or you’re looking to start your own accessory business, you now know how to make resin jewellery from scratch – congratulations!
If you can’t wait to get started making your own epoxy resin jewellery, then make sure you pick a good quality resin, as this is the most important element of the process.
Don’t be afraid to experiment and have fun with colours, shapes, and embellishments. If something doesn’t work, simply try something else!
Good luck and have fun!