Make Your Own Impact Resistant Cosplay Props Using UreCoat Flexible Urethane Coating
So you want to make your own custom cosplay props. Where do you begin?
If a prop is going to survive a convention, or a LARPing session, then the props need to be lightweight and durable, but also stylish and affordable. For this kind of project, the material that best fits this description is a brushable urethane plastic, like Urecoat. Urethane plastic is impact resistant, flexible, and strong even when applied in thin coats. Perfect for props like shields and armor.
For this project, you will first need to make a mold from an original model or sculpture.The shape of the model will determine the type of mold you’ll be using. For this demonstration, we will be using a simple round shield, which requires a silicone mold with a plaster shell.
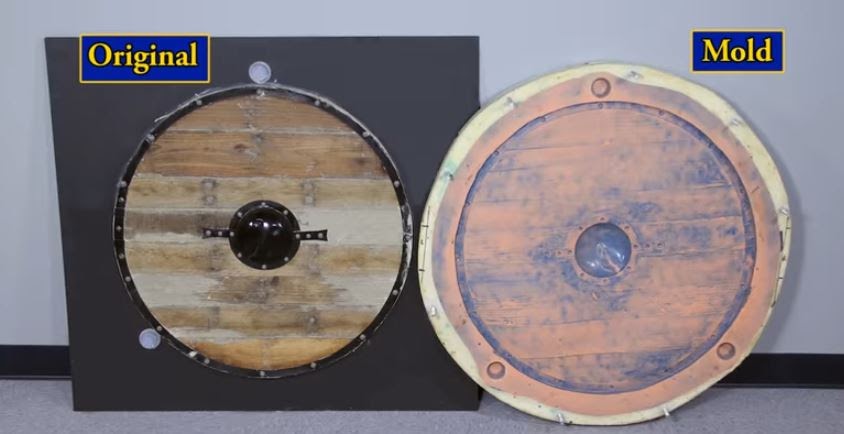
Once your mold has be made you’re ready to begin casting the shield. In this tutorial, we outline the steps to make this Urecoat shield.
STEP ONE: HOW TO MIX URECOAT
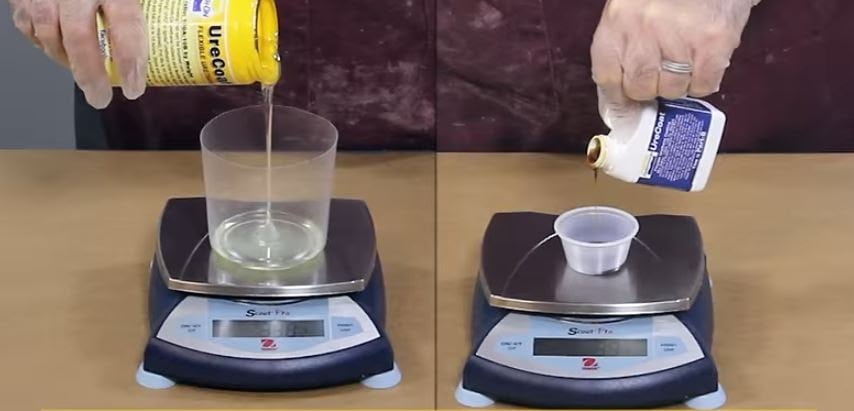
Urecoat is a two part polyurethane plastic, which means it will require part A and part B to be mixed before it begins to cure.
Before mixing the components, thoroughly mix each part separately. Ingredients in the plastic may settle over time, so for best results make sure the ingredients are evenly distributed. Urethane plastics are sensitive to heat and moisture in the air, so storing and working with this product at room temperature (73F/23C) is recommended. Otherwise, the Urecoat may begin to cure faster than expected!
The mix ratio for Urecoat is 100A:10B by weight. For every 100 grams of part A used, 10 grams of part B will be needed for the Urecoat to cure. To properly measure out both parts of the plastic, you will need to use a gram accurate scale.
When mixing part A and part B, take care to scrape the sides and bottom of the mixing container for any leftover product.
Once mixed, Urecoat has about an 8 minute pot life, or working time, until the plastic begins to set. For thin coats, a second layer can be applied after 30 minutes, and full castings take about 16 hours before they are ready for demolding.
STEP TWO: METALLIC HIGHLIGHTS
For the first layer of the shield, measure out 200 grams of part A and 20 grams of part B.
Before mixing the two components together, tint can be added to part A for a variety of effects. For the metallic details of the shield, add UVO Black and Cast Magic SIlver Bullet to part A and stir until the tint is evenly dispersed. This will give the plastic a metal-like finish with no painting required. Add part B and mix well.
Use a chip brush to apply a thin layer of Urecoat to the metal details of the mold. Work the plastic into all the details of the mold.
Move quickly, you have about 8 minutes of working time once parts A and B have been mixed!
Allow the first layer to dry for at least 30 minutes before moving onto the next coat.
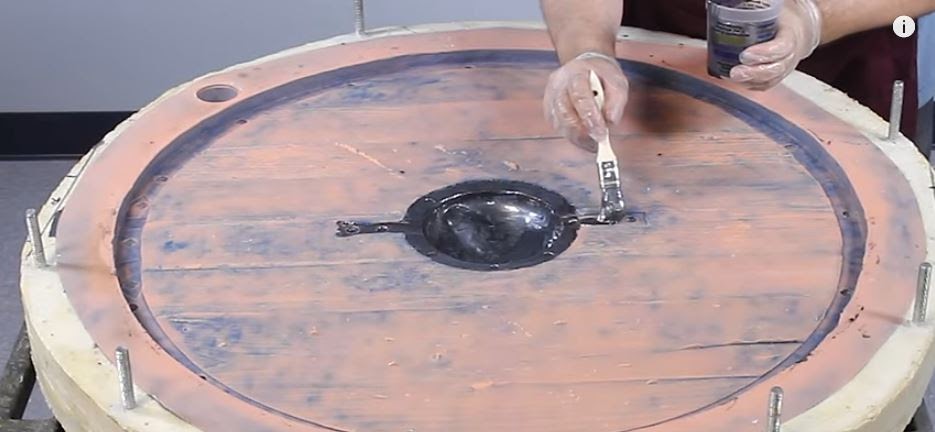
STEP THREE: ADDING A CUSTOM DESIGN
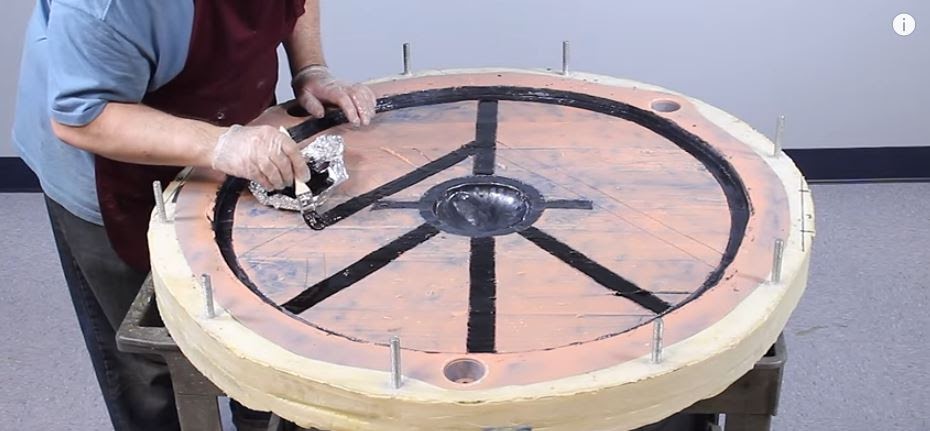
Make your shield unique by adding a custom design or sigil. Use a marker (and ruler for straight edges) to map out a design on the surface of the mold. Don’t worry, the marker will not stain the surface of the mold.
To slightly extend the put life of the Urecoat, create a tray out of a double layer of aluminum foil. Spreading out the Urecoat on the tray will help increase the pot life of the product, and give you more time to paint on the design.
Measure out 100 grams of part A and 10 grams of part B. Add UVO Black (or contrasting color of your choice) to part A. Mix thoroughly following the steps outlined previously, and pour the contents into the aluminum foil tray.
Using a chip brush, paint the design on the surface of the mold. Follow the design outlined on the surface of the mold, and try to keep this layer as smooth and even as possible for best results.
Allow this layer to also dry for 30 minutes before moving onto the next step.
STEP FOUR: CREATING THE SHIELD’S PRIMARY COLOR
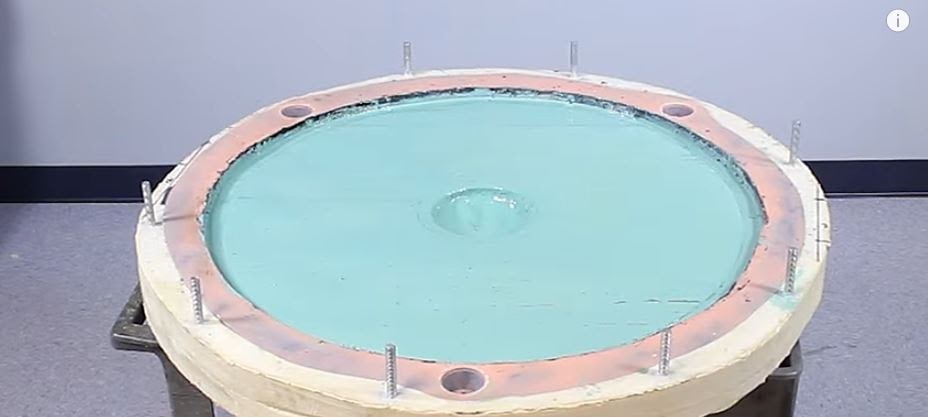
For the main body of the shield, measure out 300 grams of part A and 30 grams of part B. Before mixing the components together, add UVO White, Brown and Green to part A and mix the tint thoroughly.
Use a chip brush to spread this color evenly over the surface of the mold. Make sure to cover the entire surface of the mold, and keep this layer as even as possible.
Next, mix a second batch of this same color, and apply an additional layer to fill in any gaps, and to build up a bit of thickness. The Urecoat will bond with itself and create an even, consistent color.
Once again, allow this layer to partially cure for at least 30 minutes before moving onto the next step in the process.
STEP FIVE: PREPARING TO BACKFILL

Now that the mold has been painted with Urecoat in the design of your choice, it is time to prepare the shield to be backfilled.
For this example, the back half of the mold is made from a piece of MDF cut to fit the mold. The back of the mold will also need to have several holes for venting and allowing the foam backfill to expand.
Before backfilling the mold, make sure that the MDF half of the mold has been treated with a layer of Universal Mold Release. This will prevent foam and urethan from bonding the the porous surface of the MDF. Use a brush to ensure that the mold release also covers the insides of the ventilation holes. Allow the mold release to dry for at least 5 minutes.
Next use a chip brush to apply a layer of Ease Release 2831 on both sides of the MDF, including the inside edges of the ventilation holes. Allow this layer to dry for 5 minutes.
Bolt the back of the mold to the front half of the mold, and you are ready to backfill.
STEP SIX: BACKFILLING

First off, what is backfilling? Backfilling is the process of backing the hard outer layer of Urecoat with a lightweight filler like FOAM-iT 10 SLOW. Using foam to make a core will help reduce the cost of product, and it will also reduce the overall weight of the shield, while still keeping it strong.
Like Urecoat, FOAM-iT is a two part product, activated by mixing parts A and B together. FOAM-it 10 SLOW is mixed 1A:1B by volume, which means you won’t need a scale this time around. Using measuring cups, or two identical containers and measure out equal parts A and B.
FOAM-iT can also be tinted, just like Urecoat, so go ahead and add Smooth-On’s So Strong tint in brown to part B before mixing in part A. Remember, scrape the sides of the container while mixing to make sure both parts are evenly mixed together.
FOAM-iT has a pot life of about 3.5 minutes, so move quickly before the foam begins to set! Pour the foam into the back of the mold through the ventilation holes. Pour the foam into several ventilation holes around the mold to make sure the material spreads evenly.
The foam will expand to 6x its original volume, so keep this in mind when measuring out the material. Any excess foam will rise up through the ventilation holes.
STEP SEVEN: DEMOLDING
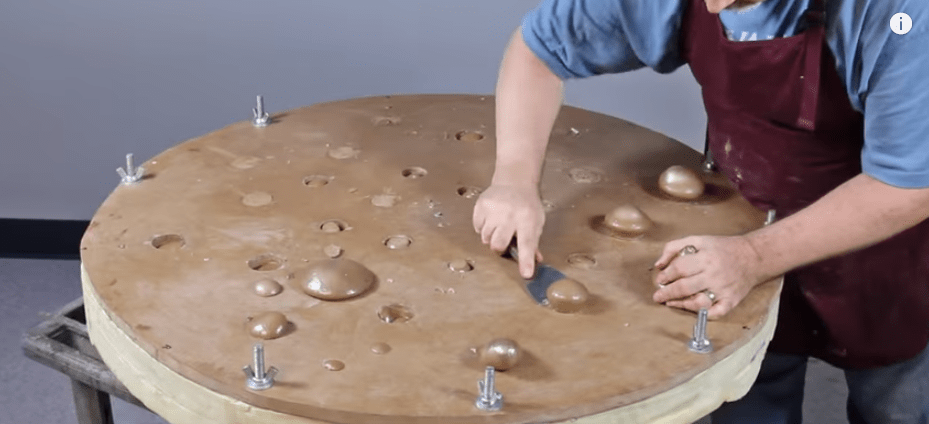
Once the foam has finished expanding, it is time to demold the shield. Use a paint scraper to chip off the excess foam which has risen out of the ventilation holes. Once the extra foam is gone, and the MDF is unbolted, the back of the mold should come away relatively easily.
STEP EIGHT: FINISHING

Time to add the final touches which will ready make this shield stand out!
First add a handle to the back of the shield using Super Instant Epoxy and securing a wooden grip to the back of the shield. It will take about 10 minutes for the epoxy to dry and form a firm bond to the back of the shield.
Next, sand down all the rough edges on the back of the shield left over from the ventilation holes. For safety purposes, always wear safety goggles and a NIOSH approved respirator while sanding FOAM-iT and other Smooth-On products. When in doubt, always consult the datasheet for your product for the best safety practices.
For the front of the shield, use a chip brush to roughly brush some back shoe polish into the wood grain texture. Adding the shoe polish will give the texture more dimension, and make the detail on the front of the shield pop. Use a paper towel to wipe away any excess, and leave only the dark highlights.
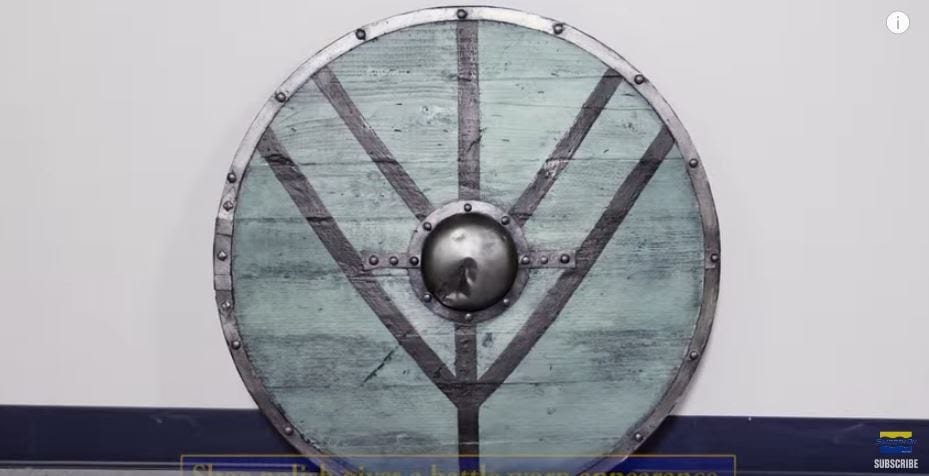
STEP NINE: THE FINAL PRODUCT
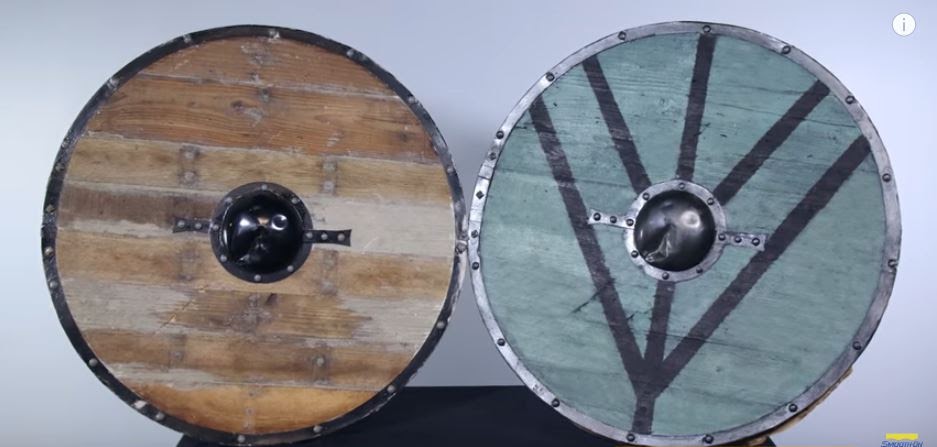
And here we have the final product: a finished prop shield ready for battle.
The outer layer of Smooth-On Urecoat has captured all the fine details from the surface of the original shield, and the added tints have given it a finished look straight from the mold with no extra work required. The FOAM-iT core also ensures that this shield is lightweight, durable, and a cost effective use of material.
This same technique can be used on any number of projects. All you need is a model and a silicone mold to get started. So get creative, and try it out for yourself! Convention season is just around the corner.