Medical Simulation: Creating a Needle Insertion Training Pad
Smooth-On products can be used for a variety of purposes. Smooth-On silicones can even be effectively used in the medical industry to simulate human tissue. In this tutorial, we will be showing you how to make your own silicone needle insertion training pads using Dragon Skin 10 Silicone
When made correctly, silicone training pads are an easy and cost effective way to practice precise and safe needle insertion. All materials used to build them are non-toxic, latex free and they are capable of holding fluid without leaking. They’re also reusable and durable, so they are an economical alternative to ready made pads.
Materials You Will Need:

-
Tyvek (Protective material)
-
Large muffin tray (metal)
-
Measuring Cups
-
Mixing sticks
-
Chip brushes
-
Scissors
-
Latex free gloves
-
Marker
Step #1 – Casting Preparation
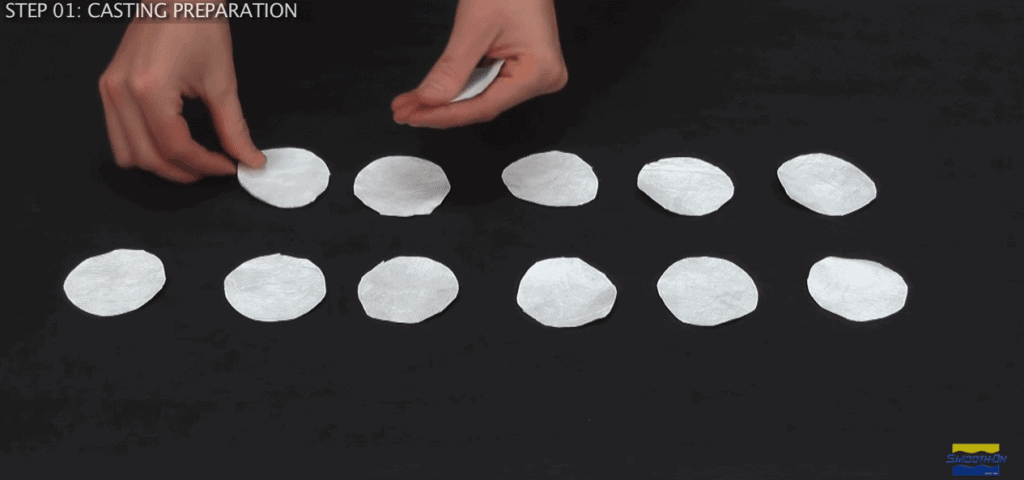
First we will start with the Tyvek. Tyvek is a high density polyethylene fiber commonly found in protective clothing.
Lay out a sheet of Tyvek and trace circles on it using the bottom of a 10 oz cup. These circles should be roughly 2 ⅜ inches in diameter. Cut them out and set them aside. You will need two circles of Tyvek per pad.
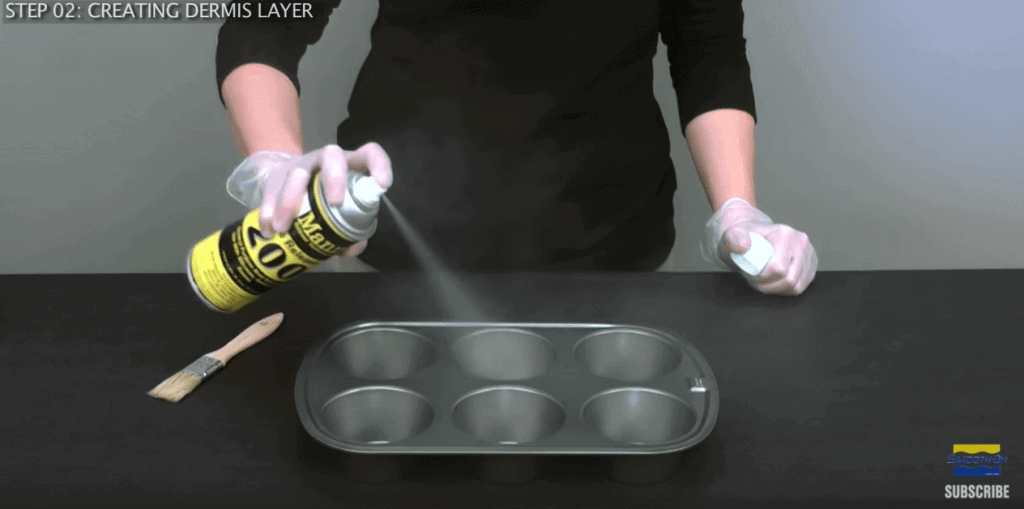
Next, lightly coat your metal muffin tray with Ease Release 200 to prevent the silicone from bonding with the tray as it cures. Spread over surface gently with a chip brush. Be sure not to oversaturate the pan. Excess Ease Release pooling at the bottom of the pan may prevent the silicone from curing properly.
Set your muffin tray aside. It is time to start mixing the silicone.
Step #2 – Creating the Dermis Layer
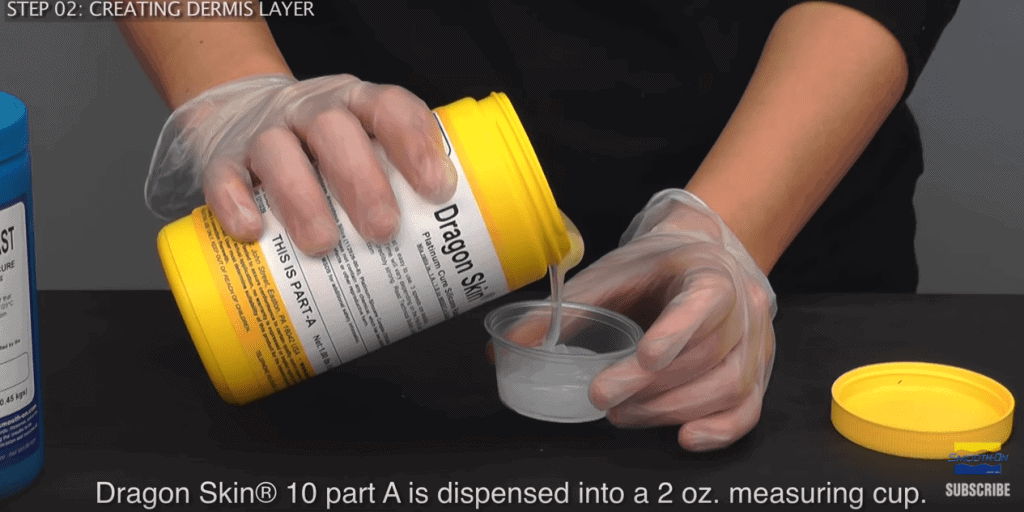
For this tutorial we will be using Dragon Skin 10 silicone. This silicone has density and feel to human skin, which makes it ideal for medical simulations.
Before measuring or mixing, be sure to pre-stir part B of the silicone inside the container. For best results, work with this silicone at room temperature (73F/23C). Increased heat or humidity may cause the silicone to cure faster than expected.
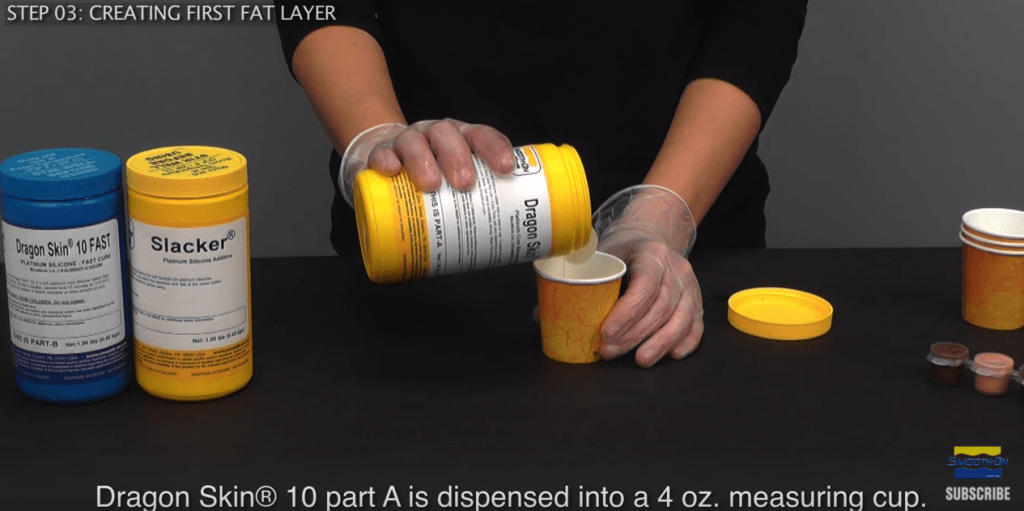
Dragon Skin 10 silicone is mixed 1A:1B by volume or weight. Measure out 2 oz of part A and part B into separate clean measuring cups.
Transfer part B into a larger measuring cup (10 oz in our example), and add a small amount of SILC-PIG flesh. Using the end of your mixing stick to scoop a few drops should be enough pigment. Mix until part B is a uniform color.
Once that is done, add part A to part B and mix thoroughly for about three minutes until mixture is uniform in color. Be sure to scrape the sides and corners of the mixing container to get any excess material that may be stuck to the container.
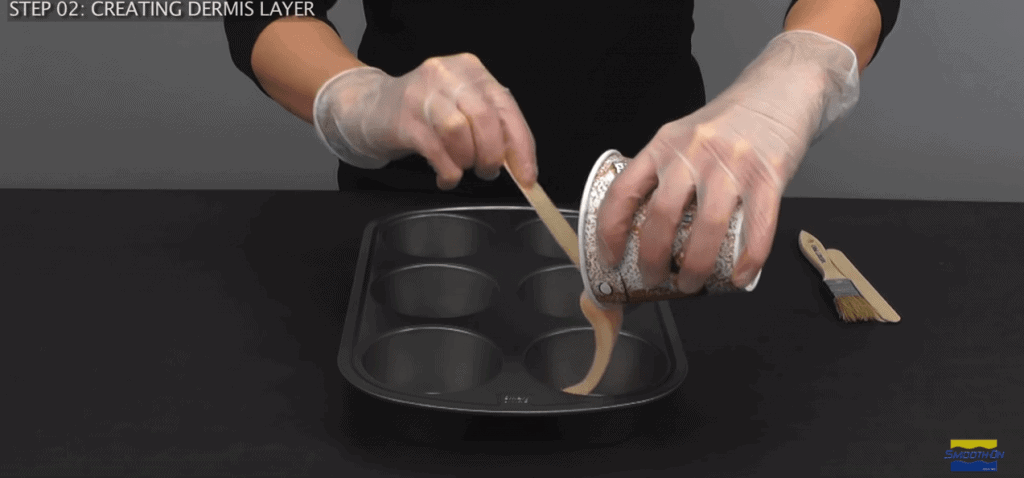
Lastly, add three drops of Thi-Vex silicone thickener to your Dragon Skin 10. This will make the silicone viscous enough to be brushed onto the inside of the muffin tray. Mix thoroughly.
Pour a small amount of the material into each of the containers in the muffin tray. There should be about ⅛ inch of silicone in each muffin cup. Then use a chip brush to coat the sides of each cup. The idea is to get an even layer of silicone around the edges and walls of the muffin cups.
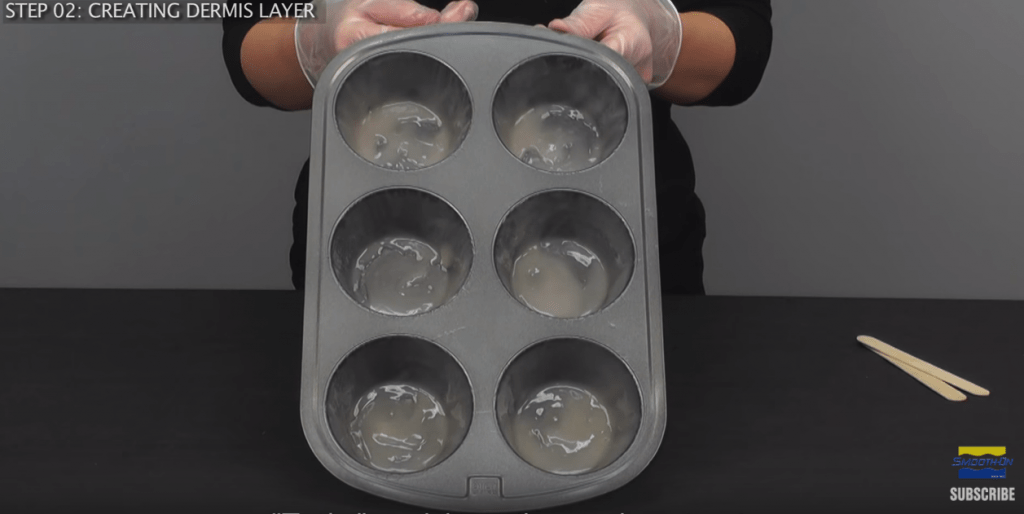
Once this is finished, allow the dermis layer of silicone to partially cure at room temperature for about 50 minutes, or until they become “tacky”.
Step 3 – The First Fat Layer
Now it is time to prepare the first fat layer for our Needle Insertion Pad. For this step, we will be adding another Smooth-On product called Slacker. Slacker will change the feel of Dragon Skin silicone, making it softer and more like human flesh.
Using Dragon Skin 10, measure out part A and part B into separate clean 4 oz containers. Once that is ready, measure out another two 4 oz containers of Slacker. You should now have 1 part A, 1 part B and 1 part Slacker.
Transfer part B into a large mixing container and add a small amount of SILC-PIG yellow. Mix part B until it is a uniform light yellow.
Add in both 4 oz containers of Slacker to part B, and then finally add part A to the large mixing container as well. Make sure to scrape the sides of each mixing container to get any leftover product. Mix everything together thoroughly. The mixture should be a uniform color with no streaks.
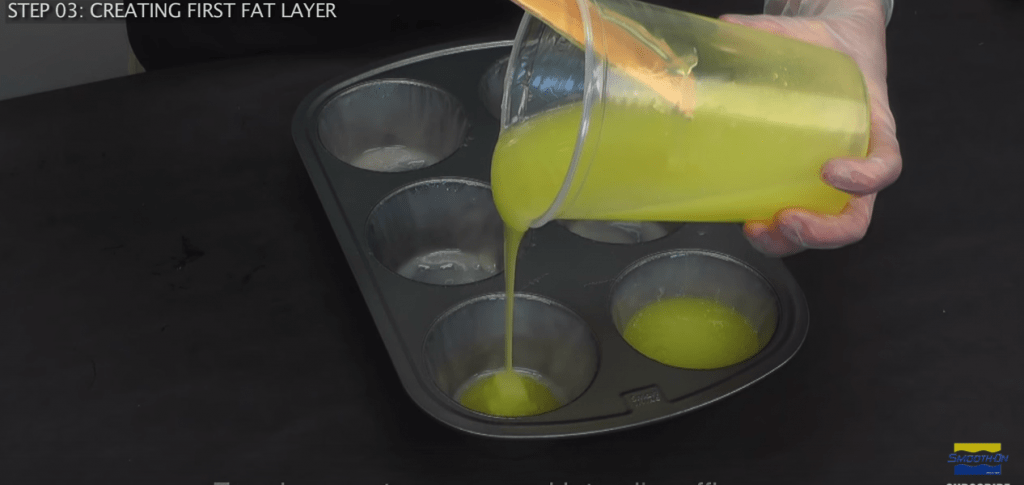
Pour about ½ inch of yellow silicone into each muffin cup. Allow this layer to partially cure at room temperature for about 50 minutes. The surface should be tacky, but not come off on your finger when touched.
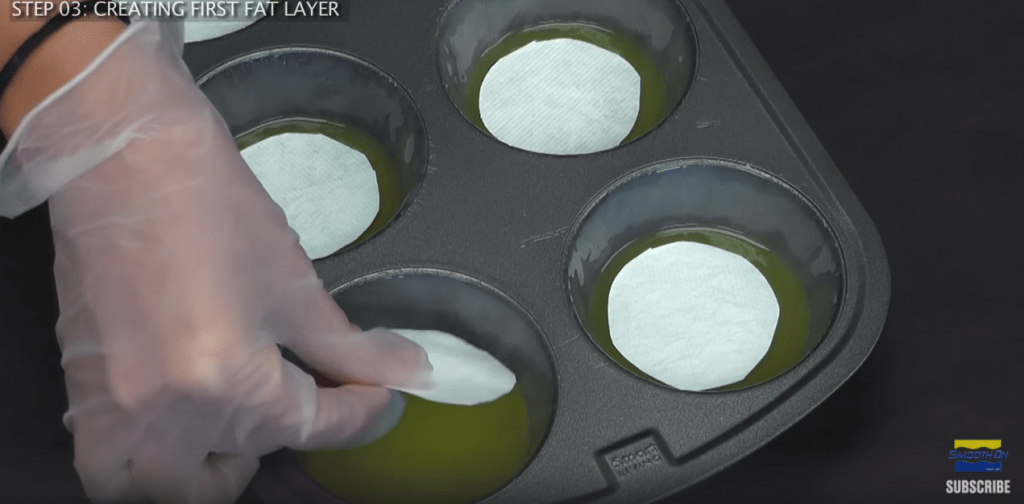
Place a circle of Tyvek on top of the tacky fat layer in each muffin cup.
Part 4 – The Second Fat Layer
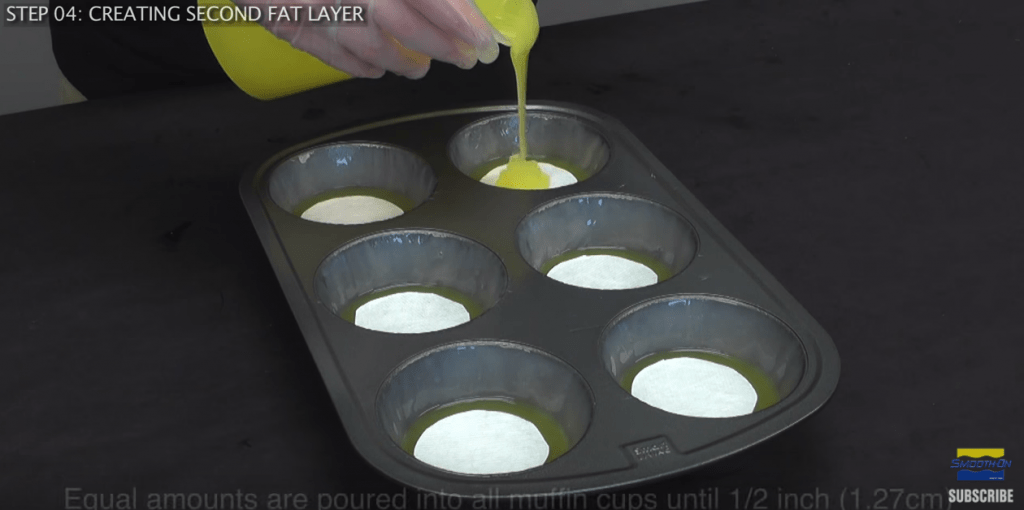
The process for the second fat layer is the same as the first fat layer.
Following the instructions listed in step three, make another batch of yellow silicone with 4 oz of part A, 4 oz of part B and 8 oz of Slacker. Mix thoroughly for about three minutes and pour evenly into each muffin container, covering the circles of Tyvek.
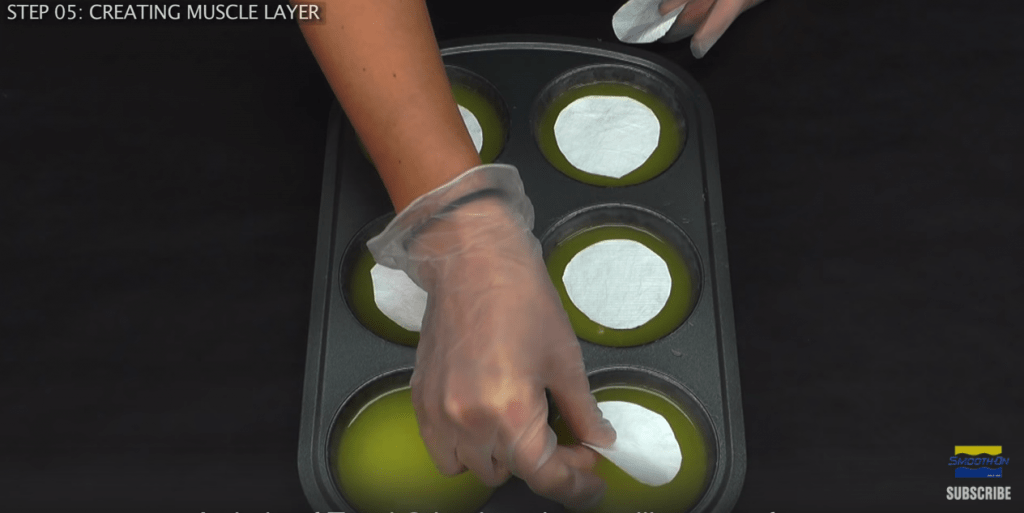
Allow the second fat layer to partially cure for 50 minutes at room temperature, and then place the second batch of Tyvek circles on top.
Part 5 – The Muscle Layer
The last layer of the needle insertion pads will be the muscle layer.
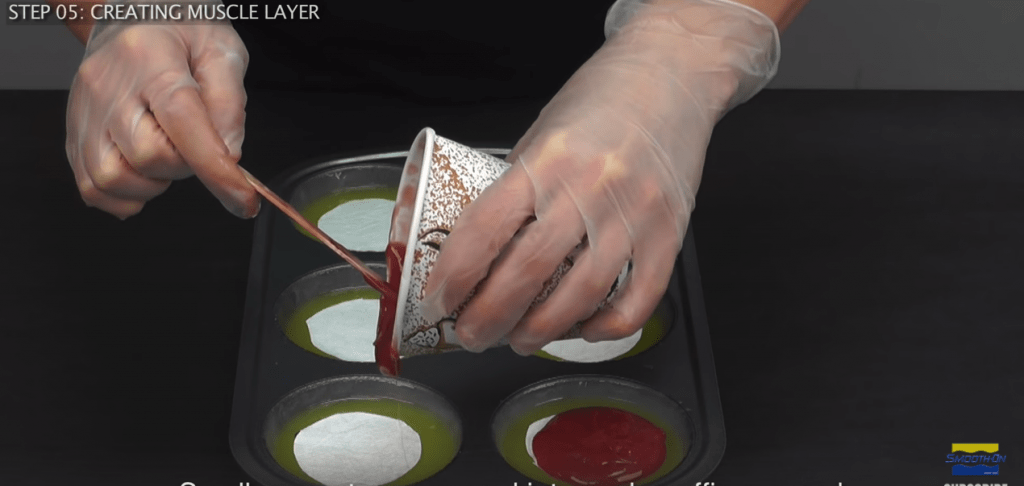
Using the Dragon Skin 10 silicone, measure out 2 oz of part A and 2 oz of part B into two separate clean measuring cups.
Pour part B into a larger mixing cup and add a small amount of SILC-PIG blood. As with the previous layers, a few drops on your mixing sticks should be enough. Mix pigment into part B until it is a uniform color.
Add part A to part B, scraping the sides of both containers, and mix thoroughly for three minutes. The color should be uniform with no streaks.
Once the silicone is mixed, pour evenly into each muffin cup. This layer should end up being about ⅜ inches thick.
Allow everything to cure fully at room temperature for 8 hours. Temperature and humidity can both affect curing time. For full details, check out the product details on the Smooth-On website. The final product should be smooth and no longer sticky to the touch.
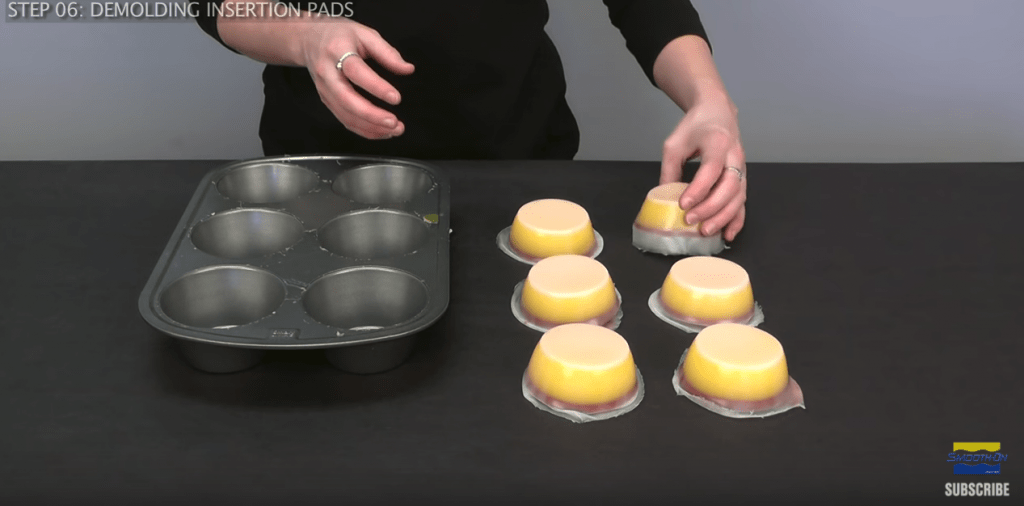
Step #6 – Demolding Pads
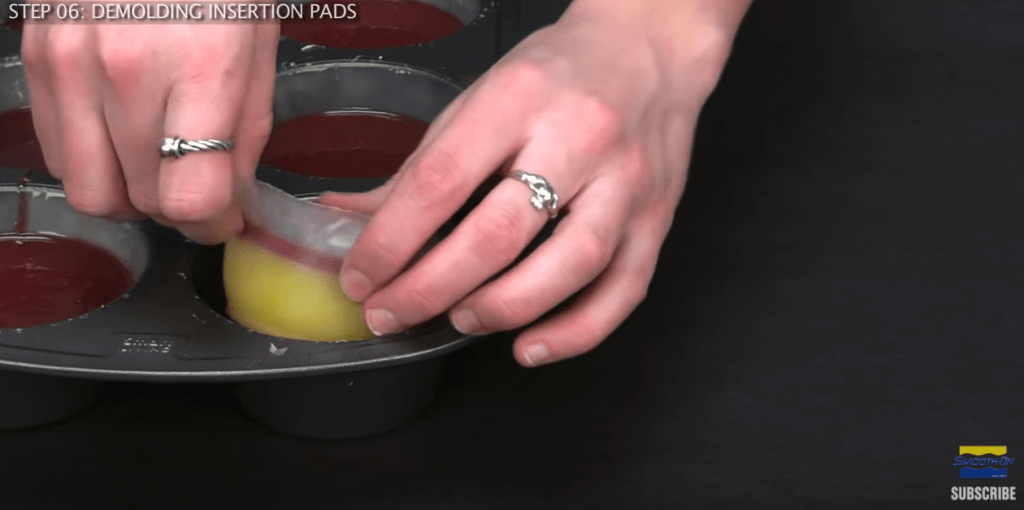
Using your fingers, carefully peel each pad away from the edges of the muffin tray. The soft silicone should easily release from their molds.
Step #7 – Finishing Insertion Pad
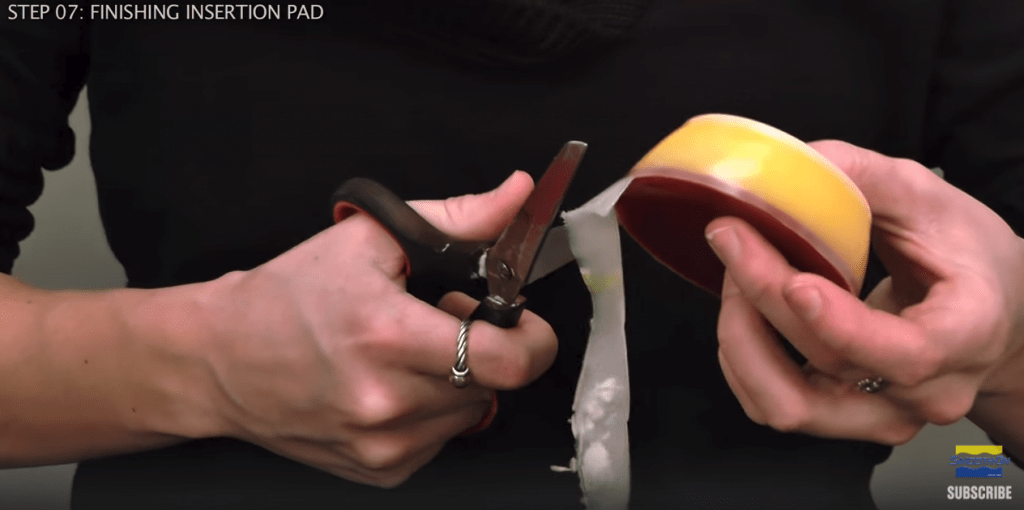
The last step of the process of making the pads is trimming away the rough edges. Use a pair of scissors to cut away the flashing along the edges of the insertion pads.
You’re done!
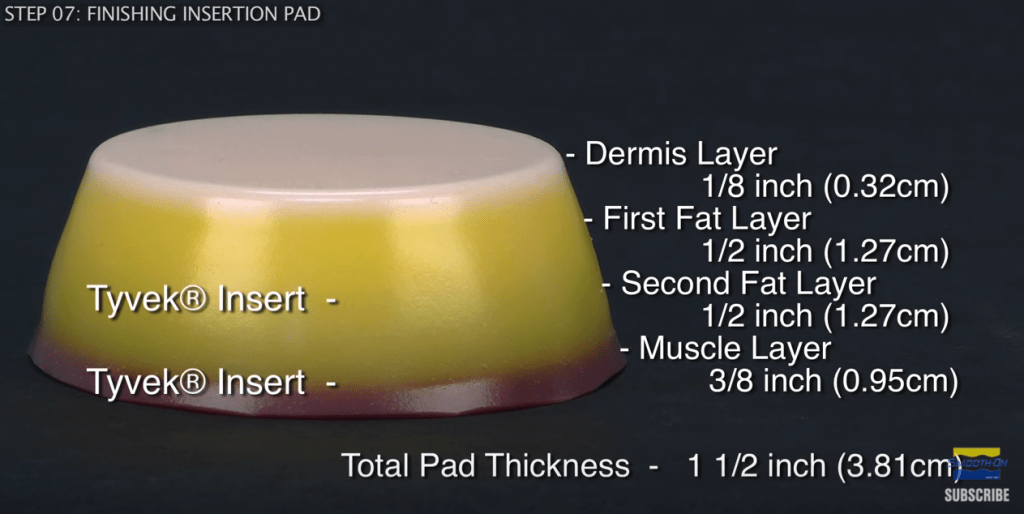
The finished insertion pads should be 1 ½ inches thick and break down like this:
-
Dermis Layer ⅛ inch
-
First Fat Layer ½ inch
-
Tyvek Insert
-
Second Fat Layer ½ inch
-
Tyvek Insert
-
Muscle Layer ⅜ Inch
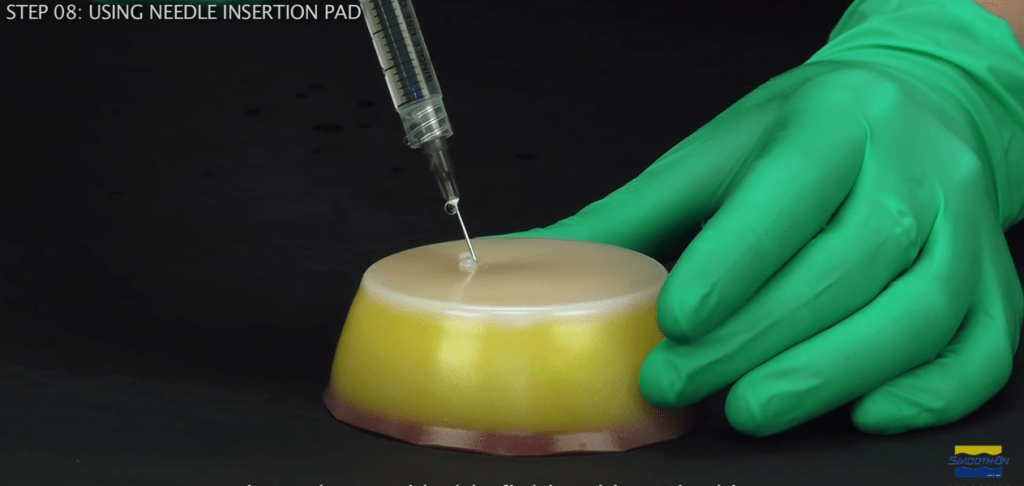
Step #8 – Using the Insertion Pad
The layers of the silicone needle insertion pad mimic the feel and density of human skin and tissue. This gives them haptic feedback ideal for medical training. Smooth-On silicones are non-toxic, durable and latex free. Save money and material by using these needle insertion pads again and again.
INTERESTED IN CREATING OTHER MEDICAL TRAINING AIDS?
We have a range of products suited to creating moulds for medical training aids, so be sure to check them out.