Easy Zombie Makeup Tutorial

Do you want to make professional-quality zombie makeup? Do you want your zombie to look like it has just climbed out of a grave? Make your zombie costume look like it walked straight out of a horror movie by incorporating homemade prosthetics in your makeup. Prosthetic wounds add dimension and an element of horror, which is a must have for any shambling corpse. They can also be prepared ahead of time and then stored for fast and easy application.
In our easy Zombie Makeup Tutorial, we will demonstrate step-by-step how to make silicone prosthetics quickly, easily, and without the use of a mold. These prosthetics can be prepared ahead of time, so the application is fast and easy on the day of the event.
For this tutorial, we will be using these Smooth-On products:
You will also need a few other supplies, such as:
- Mixing Cups
- Mixing Sticks
- Makeup Brushes
- Pencil
- Scissors
- Melamine Coated Baseboard (Available at Hardware Stores)
Silicone products will bond with most porous surfaces, so be sure to clear a workspace for your project. Factors such as heat and humidity can also affect the working time – or pot life – of silicone, so for best results, it is best to work at room temperature.
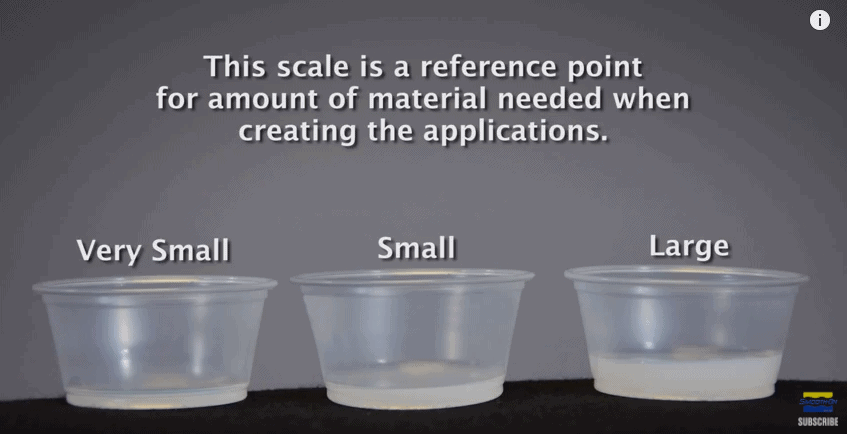
Also, for this zombie makeup tutorial, we will not be using exact measurements. Exactly how much product you use depends on the overall look you want to achieve. Instead, we will use general sizing terms such as “very small” or “small”. Above is a visual of how these batches should look. Got all your supplies ready to go? Let’s get started!
1. PREPARE THE MELAMINE
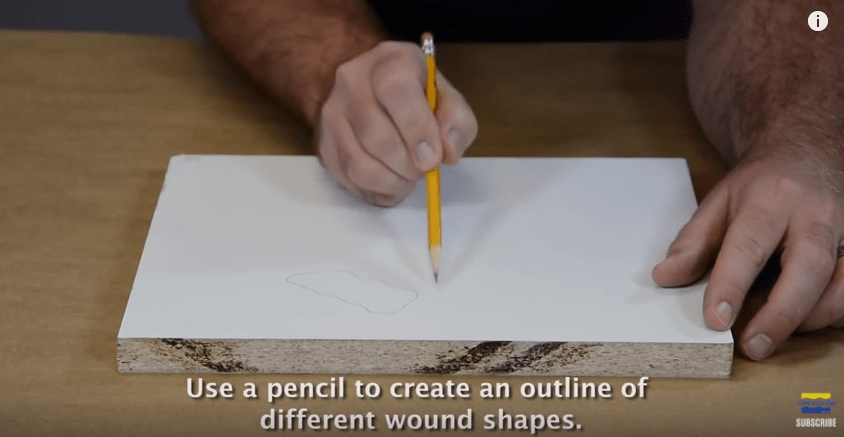
The melamine will be used as a working and drying surface for our Smooth-On Dragon Skin FX-Pro. The surface is non-porous, so the prosthetics can be easily peeled off once the silicone is fully set. Use a pencil to roughly map out the shape of the zombie wounds you would like to make. These will just be a guideline, so they don’t need to be perfect. Organic shapes will look natural once applied to the model. You should also keep in mind where the wounds will be placed on the skin – it helps to have an idea of the approximate size and shape that is needed to fit the model.
2. MEASURE AND MIX DRAGON SKIN FX-PRO
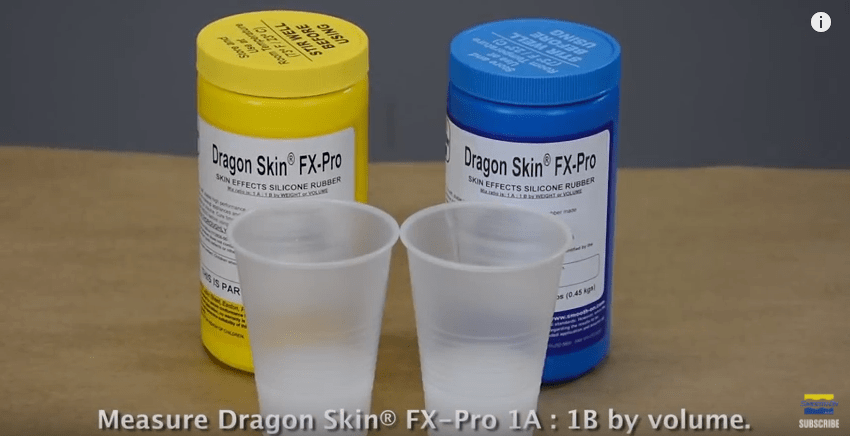 Once the melamine is prepared and ready to go, it’s time to mix the Smooth-On silicone. Dragon Skin FX-Pro will come in two containers labeled “Part A” and “Part B”. Dragon Skin FX-Pro is mixed 1A:1B by volume. Use two identical containers, such as these plastic cups, to measure out equal parts of A and B. Mix enough for a large batch, as this silicone will be used to sculpt the prosthetics. Use a stir stick to add a couple drops amount of flesh tone pigment to part B of the silicone and mix it thoroughly. This will provide a base color to work on when blending the product into the skin.
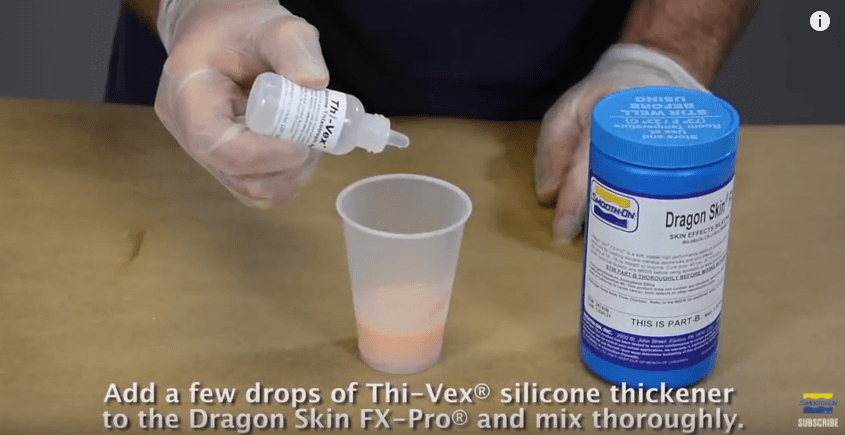
Next, add a couple of drops of Thi-Vex silicone thickener to the Dragon Skin silicone. Adding the thickener to the silicone will make Dragon Skin viscous enough to sculpt directly onto the melamine.
Thoroughly stir both parts A and B together. Use the mixing stick to scrape the sides of the container to ensure that there is no unmixed product. At this point, if the silicone still seems too runny, add in a few more drops of Thi-Vex silicone thickener. Once the Dragon Skin is at the desired thickness, it is time to begin sculpting the prosthetics.
3. SCULPTING THE PROSTHETICS
Now comes the fun part: sculpting the wounds on the melamine we prepared earlier. Use a stir stick to carefully spread Dragon Skin into the wound shapes drawn on the melamine.
Build up areas in the middle of the prosthetics to create depth. Leave recessed areas to create cuts or stab wounds. Most types of wounds can be made using very little amounts of silicone, so feel free to experiment!
Once the wounds are in about the right shape and size, use a stir stick to carefully flatten out the outside edges of the prosthetic. The outside edges will be blended into the skin, so making them thin will make the application process easier.
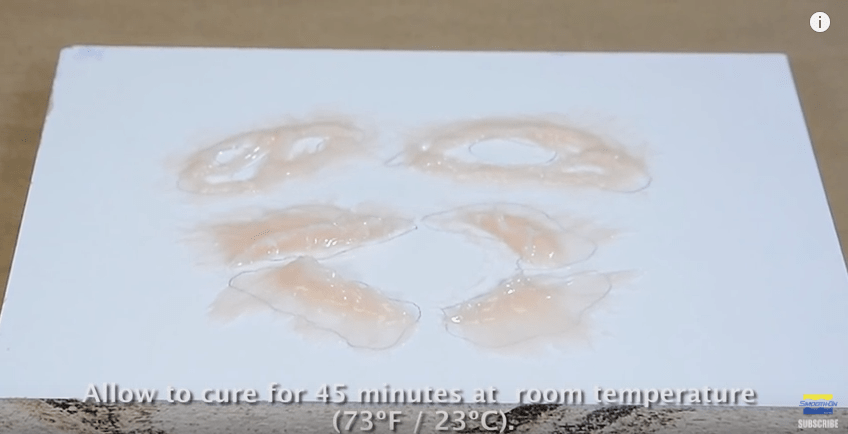
4. PREPARING THE WOUNDS
Let the wounds sit at room temperature for about 45 minutes. When you return, the prosthetics should be fully cured and ready to remove from the melamine.
Using a brush and some talcum powder, carefully lift the edges of each wound and remove it from the melamine. Always keep silicone prosthetics on a dry flat surface until they are ready to be used.
5. PROSTHETIC ADHESIVE

Congratulations, you are ready to begin applying makeup to your model!
The first step is to prepare your model’s skin. Make sure you use alcohol or cleaning wipes to clean the areas where prosthetics or makeup will be applied before you begin. Excess oils on the skin can cause the edges of your prosthetic to lift and reveal unsightly seams.
Next, mix a small batch of Smooth-On Skin Tite. Like Dragon Skin, this is also mixed 1A:1B. Stir thoroughly, and use a stir stick or brush to apply a thin layer to the areas where prosthetics will be applied. Allow the adhesive layer to partially cure for at least six minutes at room temperature before applying any prosthetics.
*Note: Avoid applying adhesives or silicone to body hair! These products will bond with hair and be painful to remove. It is recommended that these areas be shaved or have the hair properly sealed to prevent silicone from bonding with the hair.
6. APPLYING THE WOUNDS WITH SKIN TITE
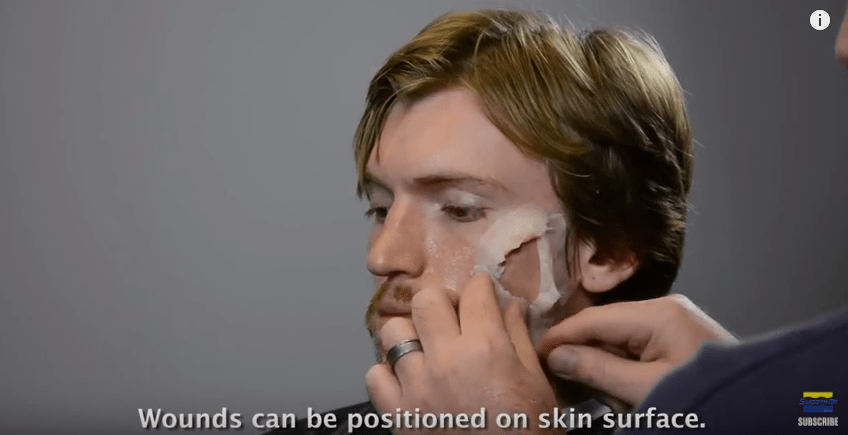
Once the layer of Skin Tite has partially cured, your zombie’s wounds can be applied directly to the skin. For best results, place the center down first and then work out toward the edges. Gently ease down the edges to minimize wrinkles and buckling. The edges of the wounds can also be trimmed with scissors to fit where necessary.

To help conceal the edges of the prosthetic, mix a larger batch of Skin Tite. Add Th-Vex silicone thickener and a small amount of Sil Pig Fleshtone pigment. Use a brush or mixing stick to carefully smooth out the edges of the wounds and patch areas where they were trimmed to fit.
The thickened Skin Tite may also be applied directly to the skin to create a roughened or decayed texture. Experiment by using a stir stick, rough bristle brush, or sponges. Thicken Skin Tite can hold onto all kinds of interesting textures.
7. PAINTING WITH SKIN TITE
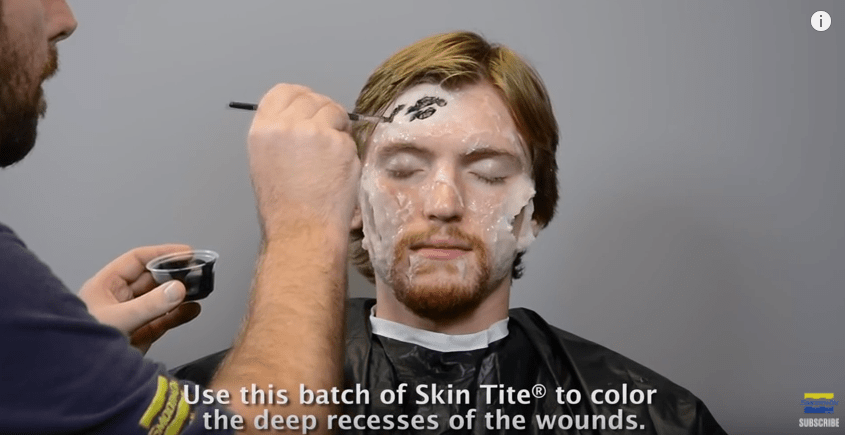
Skin Tite can be tinted in a variety of colours to complete your zombie look. Mix another very small batch of Skin Tite with a few drops of Sil Pig in black, and use a brush to apply it inside the deep recesses of your zombie’s wounds. Adding black in these areas will give depth, and create the illusion that the wounds go deep into the flesh.
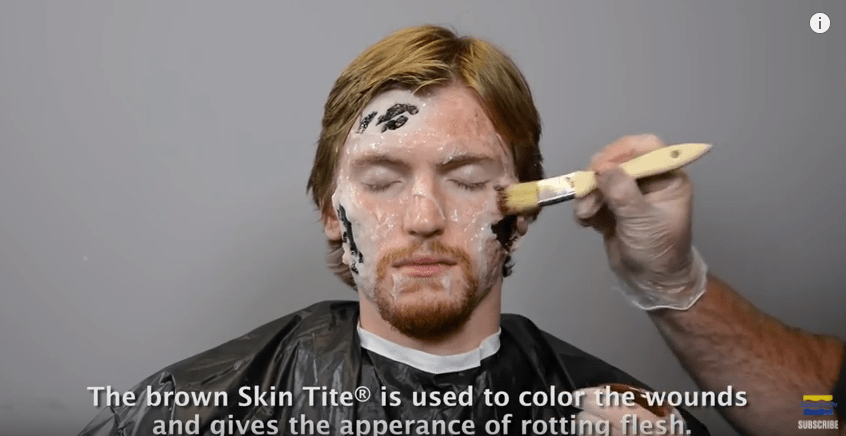
Mix another small batch of Skin Tite with some brown Smooth-On Silc Pig, and use it to contour around the outsides of the wounds to give the skin a rotten appearance. Experiment by adding colour to your creation until you reach the desired level of decay.
Lastly, it is time to add a bit of gore. Mix a third small batch of Skin Tite, but this time add Sil Pig blood tint. Apply your blood to the insides of wounds, around the mouth, and just about everywhere else really. Allow all layers of Skin Tite to dry at room temperature for another six minutes.
8. THE FINAL TOUCHES
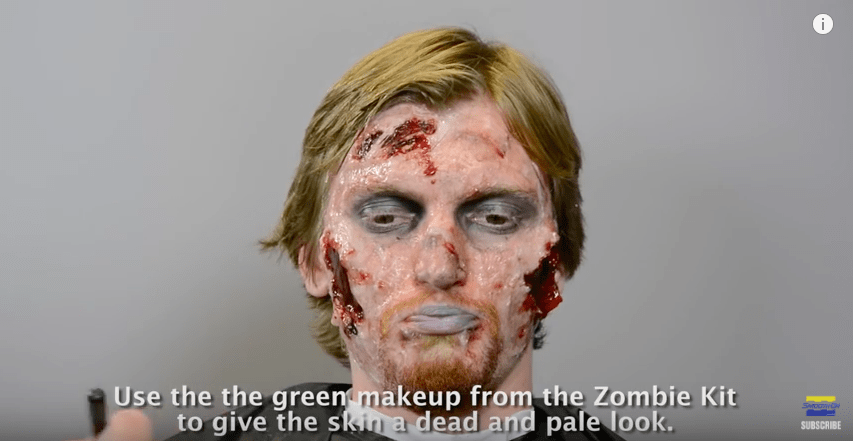
Use the makeup provided in the zombie makeup kit to contour or add color to sensitive areas, such as around the eyes. Apply blacks around and under the eyes to make your zombie’s eyes appear sunken in. Add greens and browns from the makeup kit to give your zombie’s skin an undead pallor and to contour the texture of the prosthetics.
Finally, as a final touch, have your model rinse their teeth with some green food coloring. We can’t have a rotting zombie with pearly whites now, can we?  With that, your zombie is ready for the silver screen, a photo shoot, Halloween and more. Make your homemade prosthetics ahead of time to make application day fast and easy. Experiment with different wounds and textures to create your own unique looks!
9. REMOVAL OF ZOMBIE MAKEUP
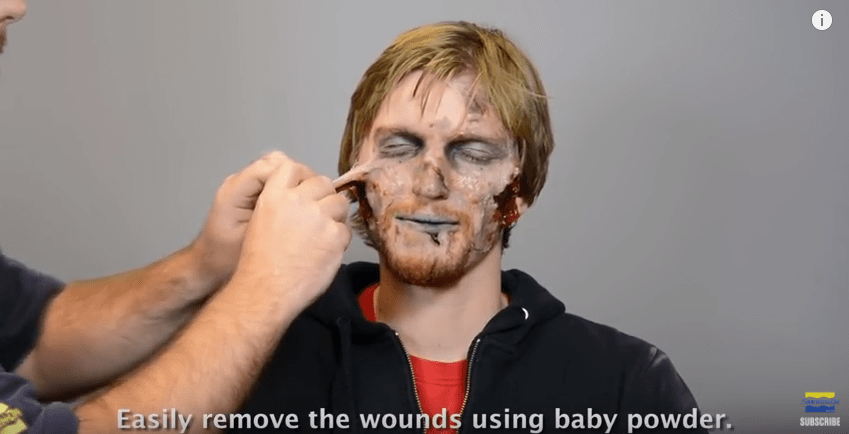
Removing Dragon Skin FX PRO silicone is easy! Gently peel the prosthetics off the skin using baby powder, and wash off any residue with warm soapy water.